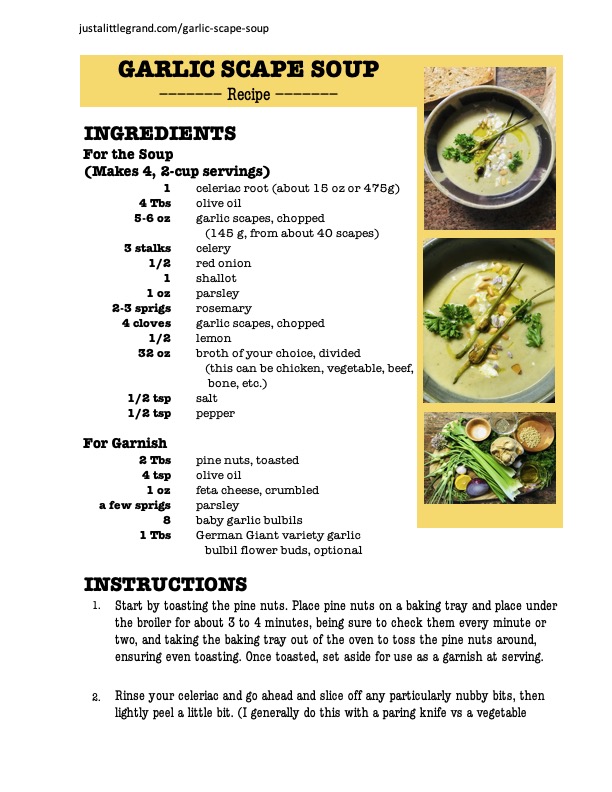
Garlic Scape Soup

(Jump to the recipe file here.)
This is the first entry in my series:
Garlic Scapes, What Exactly Do You Do With These Things? {Part 1}
Garlic Scapes:


If you’ve ever been offered these things by a neighbor or seen them at the farmer’s market, you’ve probably turned them down or passed them by. I understand. I’ve been married to a garlic farmer for 3 and a half years, and I’ve been tinkering with them the whole time. I have now come up with and perfected my 3 all-time favorite ways to eat Garlic Scapes, and I’m on a mission to educate the world of what exactly you can do (and do well) with these things.


First off, let’s talk about what they are, and why garlic growers are always trying to give them to people, neighbors, shops, farmers markets, local coops, restaurants with adventurous chefs, you name it.
Garlic has about 3 different ways of reproducing. It’s also one of the oldest recorded plants, with evidence of Alium sativum L. being used by humans since the dawn of the Neolithic period and the first written accounts of (already) domesticated garlic being grown by the Sumerians from 2600-2100 BC1. It’s no wonder this plant has made it so long with so many ways of propagating; it’s got all the reproductive bases covered.
- Koch, Heinrich P., Ph.D., M. Pharm, Lawson, Larry D., Ph.D., Garlic The Scientific and Therapeutic Applications of Allium sativum L. and Related Species, Second Edition, Williams & Wilkins, 1996
You can plant one clove from a multi-cloved head of garlic and get another multi-cloved head of garlic, with 6 to 8 cloves on average. German Giant varieties have additional, very hard seed-pod type cloves on the outside of the edible cloves, called corms. If you plant a corm, you’ll get a single-cloved garlic, called a round. Next growing season, if you plant that round, you’ll get a multi-cloved head of garlic, smaller than the original, parent garlic, but if you continue to plant those individual cloves, they will eventually grow full-sized multi-cloved heads of garlic.


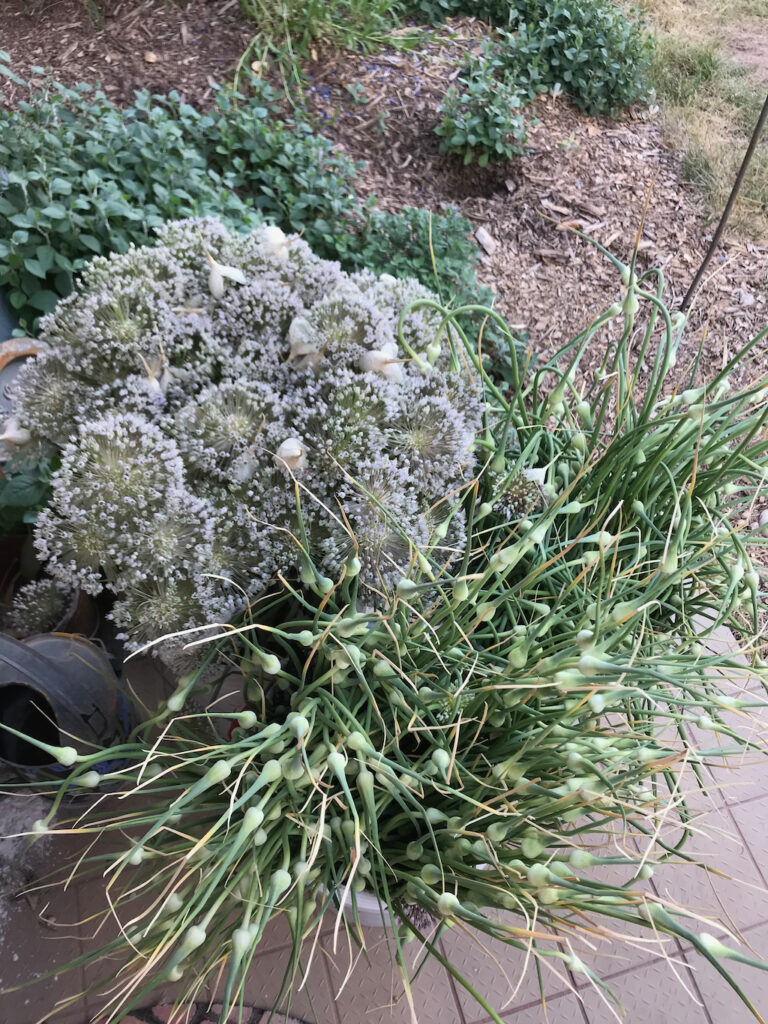
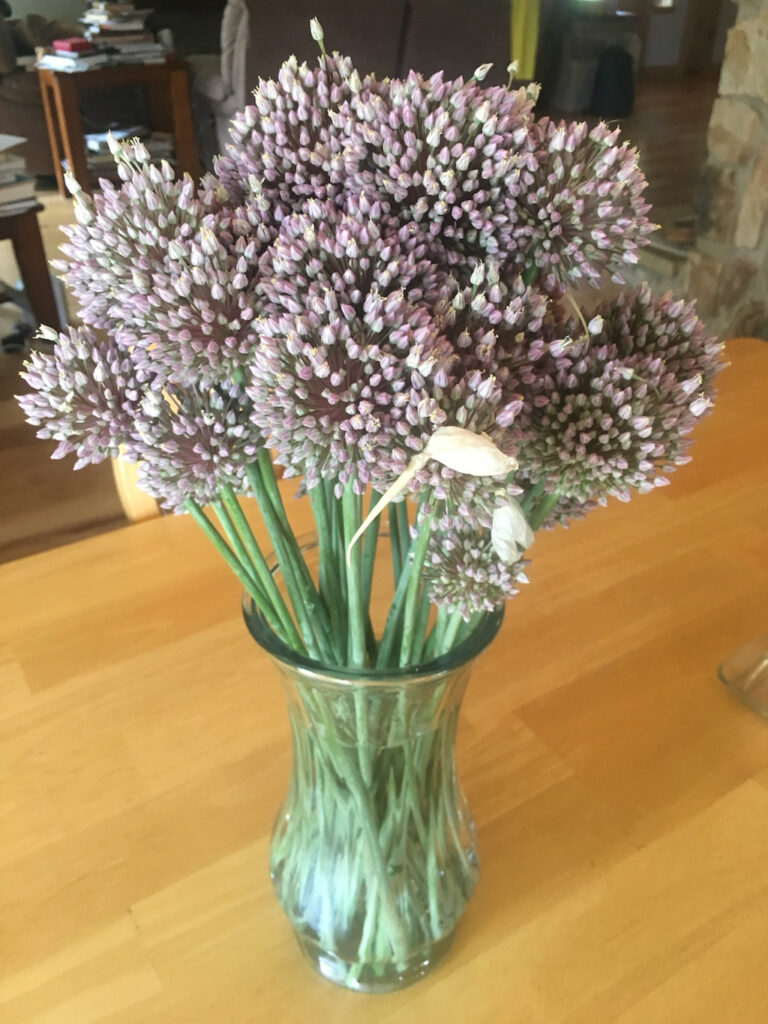
All garlic varieties have central stems with a flower bud on top. The stem of this flower shoot is called a scape, and the flower bud is called a bulbil. You can plant any of the 100+ flower buds and get a round, then the following season you can plant the round and get a multi-cloved head of garlic. It’s amazing. Even more amazing is that every part of the plant is edible, but keeping the Yin and Yang and the balance of the universe in check, as versatile and as easy as it is to use the garlic cloves, the scapes take a little bit of work. Order and chaos, Yin and Yang, from root to blossom.


Scapes (and their bulbils) need to be trimmed from the garlic plant as soon as the majority of the scapes make a turn or a loop. Some garlic varieties’ scapes make several, Dr. Seuss-ish loopty-loops. Ours, Purple Stripe, just make a downward turn, and then it’s time to trim. Our German Giant grow straight up, then bloom, and it’s time to trim just before blooming. Trimming the scape makes the plant divert all its energy to making big, healthy cloves, since its seed pod is gone. That’s why garlic farmers are always trying to give their scapes to their neighbors a month or two before garlic harvest; they’ve got to be trimmed. It’s a win-win, people! Hopefully my next 3 blog posts will help you help your garlic farmer out. And you’ll get some ridiculously delicious, spring-time, once-a-year, immensely healthy and cleansing dishes.
This is beyond a win-win. It’s a win-win, win-win-win-win.
Here is my top-ranked favorite way to use garlic scapes:
Garlic Scape Soup.
I’ve seen a total of 2 other recipes online for Garlic Scape Soup (one recipe I found as a link from another recipe), that linked one uses cream, (you can find that recipe at The Messy Baker) to make it creamy and the other, from one of my favorite blogs, The Lemon Apron, uses potatoes to cream it up. Steven Gundry M.D., however, has a recipe called Tops and Bottoms Celery Soup in his book The Plant Paradox, for a truly creamy Cream of Celery Soup without the cream. (Now, I’m not against cream, far from it, but after I put about a quarter of a cup of it in my coffee in the morning, I don’t really want to eat a bowl of it in the evening 😉 Steven Gundry’s recipe uses celery root, also called celeriac, to achieve the creamy texture of the soup. (He calls celeriac, perhaps the ugliest vegetable in the market, and it’s true.) Celeriac being ugly or no, Dr. Gundry’s soup base is a match made in heaven for simmering and stewing down these woody, finicky garlic scapes.
It’s a perfect marriage of two misfit produce items: scapes and celeriac.


Here goes:
Garlic Scape Soup
(Make 4 2-cup servings)
You’ll Need:
For the Soup
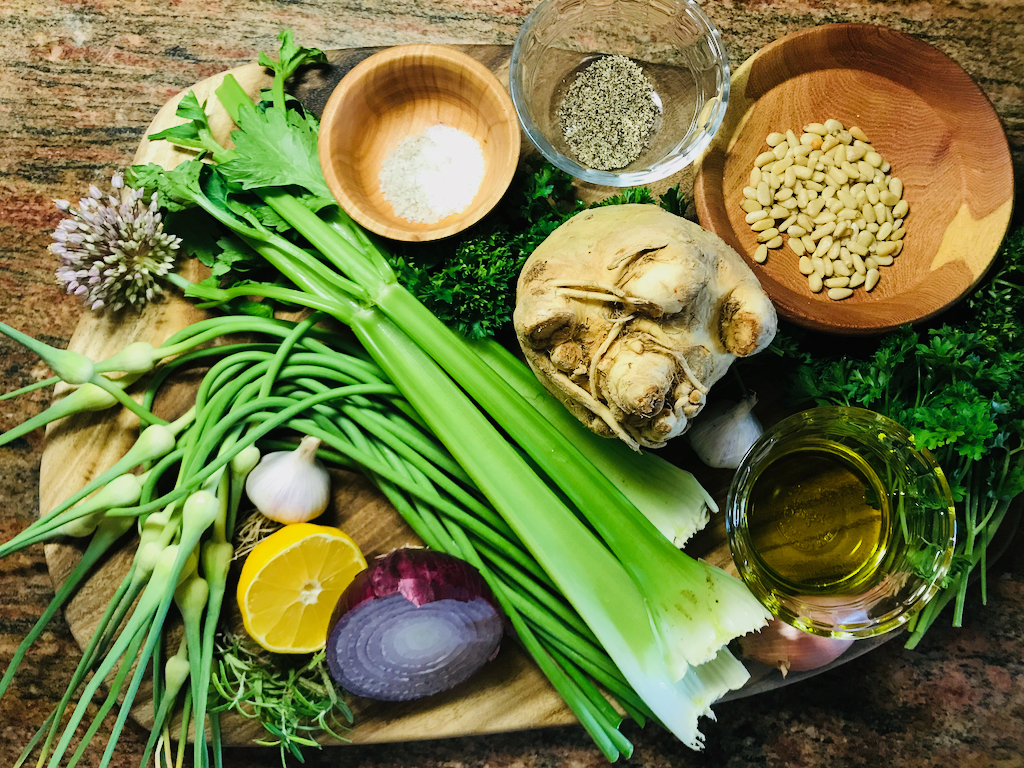
- 1 celeriac root (about 15 oz or 475 g)
- 3 – 4 Tbs olive oil
- 5 – 6 oz garlic scapes, chopped* (145 g , from about 40 scapes*)
- 3 stalks celery
- ½ red onion
- 1 shallot
- 1 oz parsley
- 2-3 sprigs rosemary
- 4 garlic cloves
- ½ lemon
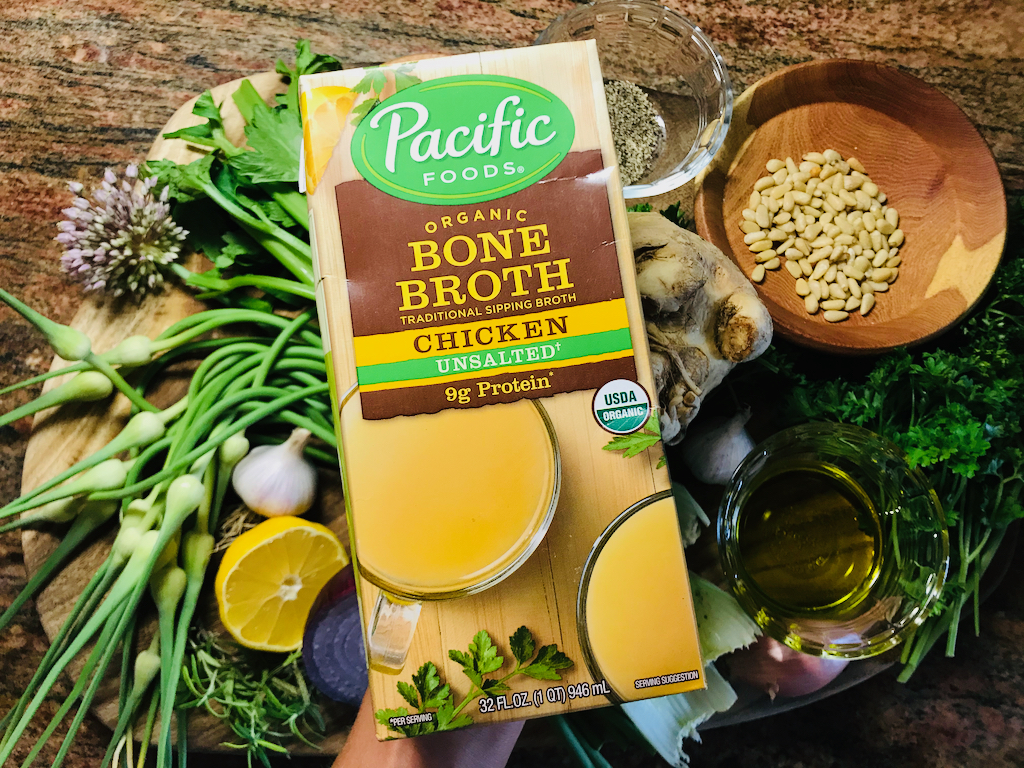
- 32 oz., divided, broth of your choice (vegetable, chicken, beef, bone, etc.)
- ½ tsp salt, or more to taste
- ½ tsp black pepper
*The variety of scape is important. You don’t want to use scapes from the larger, more mutated varieties like German Giant, which is more related to the onion family than to true garlic. (German Giant is really impressive though, and still tasty, but mild; we always sell out of it first.) Calling for 40 scapes may seem like a lot, but I only use the most flexible part of the stem and discard the rest. 40 scapes should yield you 5 to 6 ounces of the most tender parts of the stems.
For Garnish:
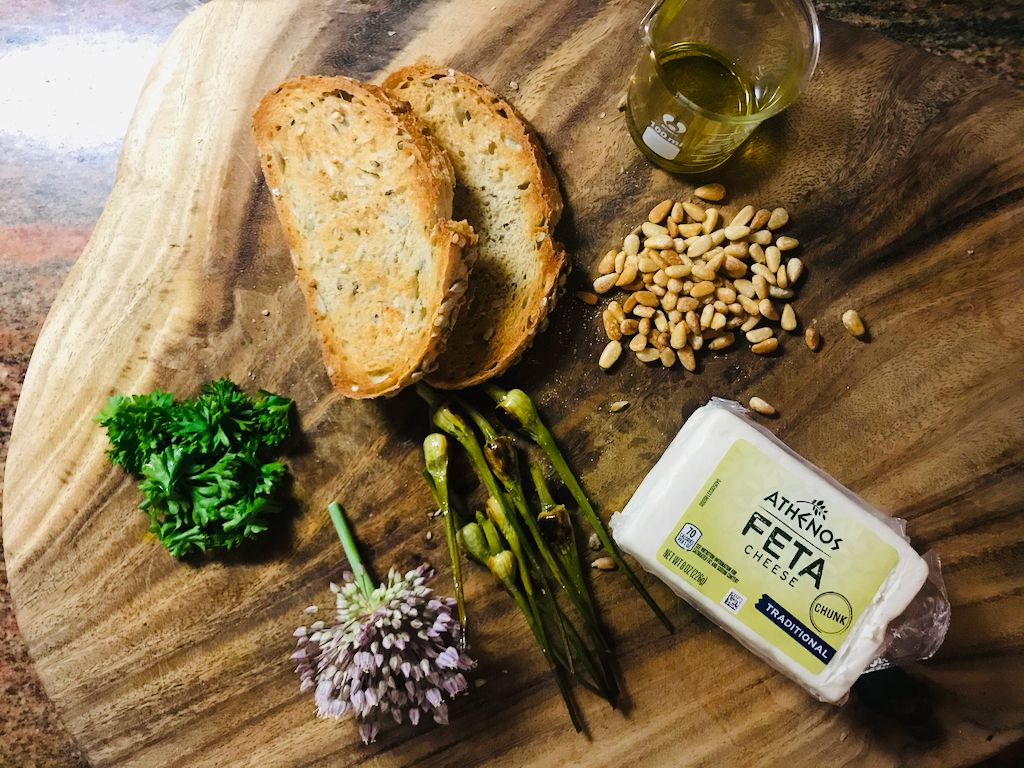
- 2 Tbs toasted pine nuts (1 oz. or 25g)
- 4 tsp olive oil
- 1 oz. feta cheese (25g)
- a few sprigs of parsley
- a couple grilled garlic bulbils per bowl
- 1 tsp German Giant type garlic allium flower buds, optional and if you’ve got them
Start by toasting some pine nuts for your garnish. This is completely optional, and Kevin said he could have done without them, but I quite liked them on there. (I also went ahead and toasted more pine nuts than I intended to use for the soup’s garnish, just for snackin’.)
Spread pine nuts on a baking tray, place under a broiler, after a minute or two, check them, take out the tray a few times and shake to flip the pine nuts. You’ll end up broiling for about 3 to 4 minutes, but watch them closely the whole time.


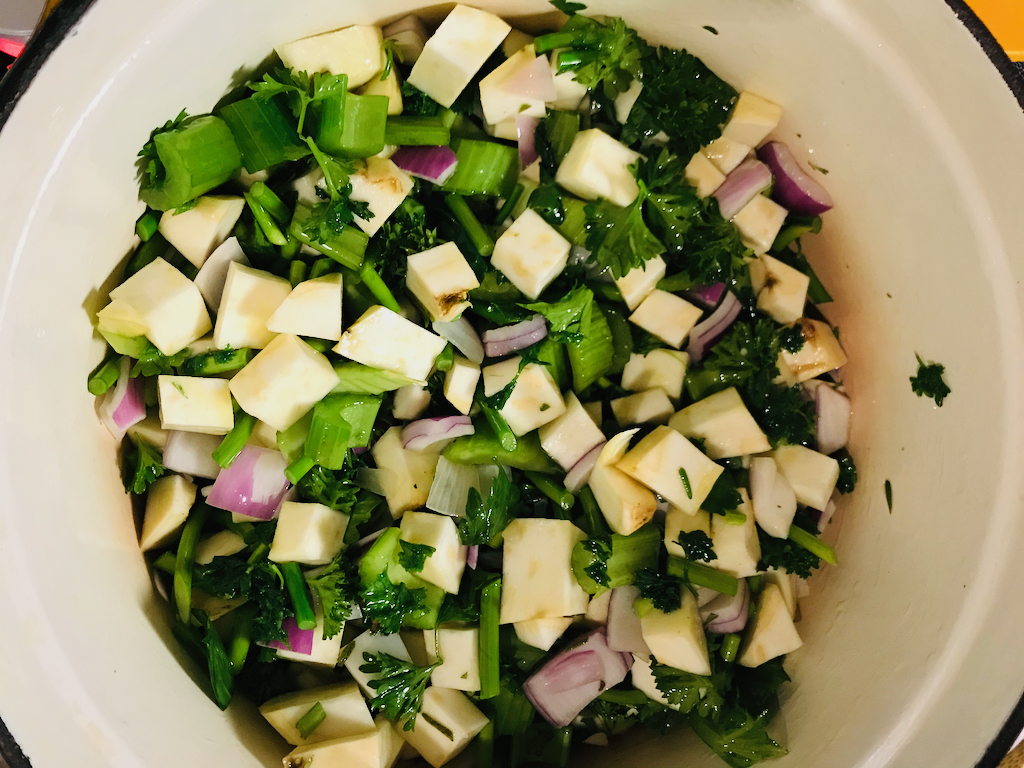
Next, rinse your celeriac. Slice off any ultra-tough nubby bits and peel just a smidge. Tell it it’s beautiful on the inside, then chop it into cubes approximately 1 inch (2.54 cm).


Add your 3 Tbs olive oil to a heavy-bottom saucepan, such as a Dutch oven, and heat over medium heat.


Rinse and chop your 3 celery stalks into 1-inch slices.


Snip the bulbils, the flower bud tips, from each scape, and set those aside, because you’ll grill those for a garnish (and more for a snack).


Pick up a scape stem and bend it in your hands and find that spot where it gets tough to bend. This is where you’ll chop each scape. Go ahead and chop the extra-woody bottom parts from each scape, (and those you can discard.)


Chop your tender scape necks into, you guessed it, 1-inch pieces.


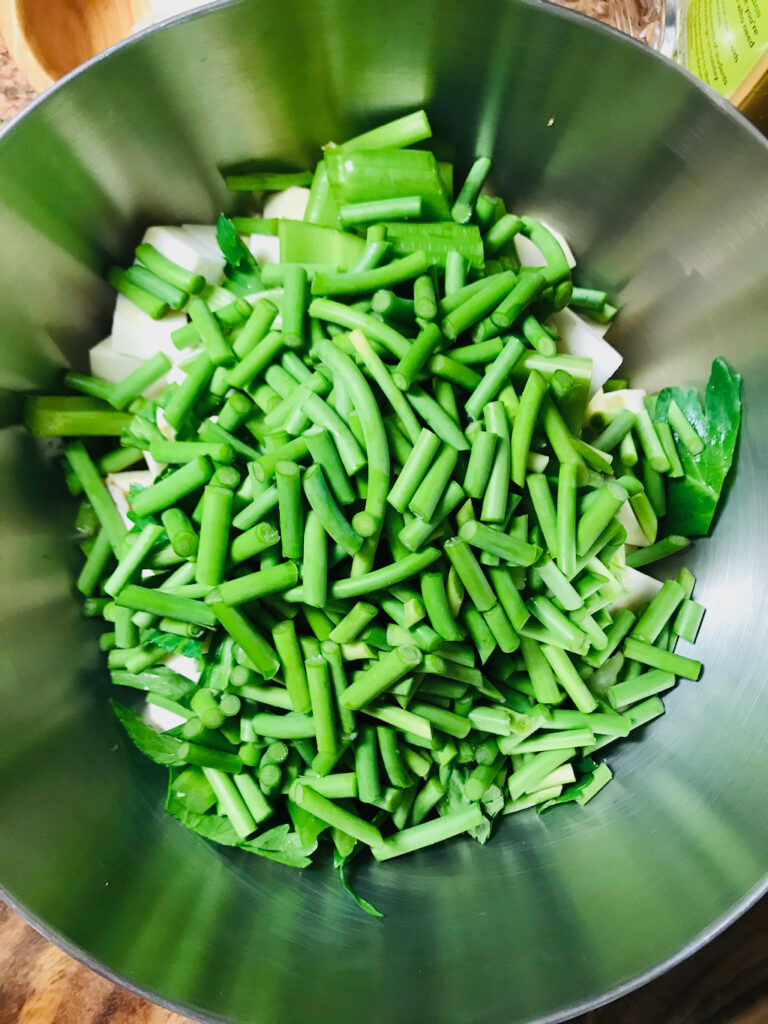
Chop your ½ red onion and your shallot into 1-inch pieces.


Pluck the leaves from your 2-3 stems of rosemary and pluck the leaves from the stems of your ounce of parsley.


Add everything up to this point into the preheated olive oil in the Dutch oven (or thick bottom soup pot.)
Toss and sauté for about 5 – 7 minutes, until the celery root and onions soften and begin to brown a little.
In the meantime, between tossing and allowing the ingredients to rest and brown, peel and smash your garlic cloves.


Once the celery root and onions have browned a bit, add the garlic cloves and squeeze in the juice of half a lemon. (You can also drop the lemon rind into the pot after squeezing the juice, just be sure to remove it before blending the soup near the end.)


Then add about 20 ounces of broth, reserving the other 12 ounces to add when blending.
Add the ½ tsp salt and ½ tsp black pepper.


Bring everything to a boil, then reduce to a simmer and simmer for 30 minutes, stirring occasionally, and checking to see that the celery root is becoming tender.


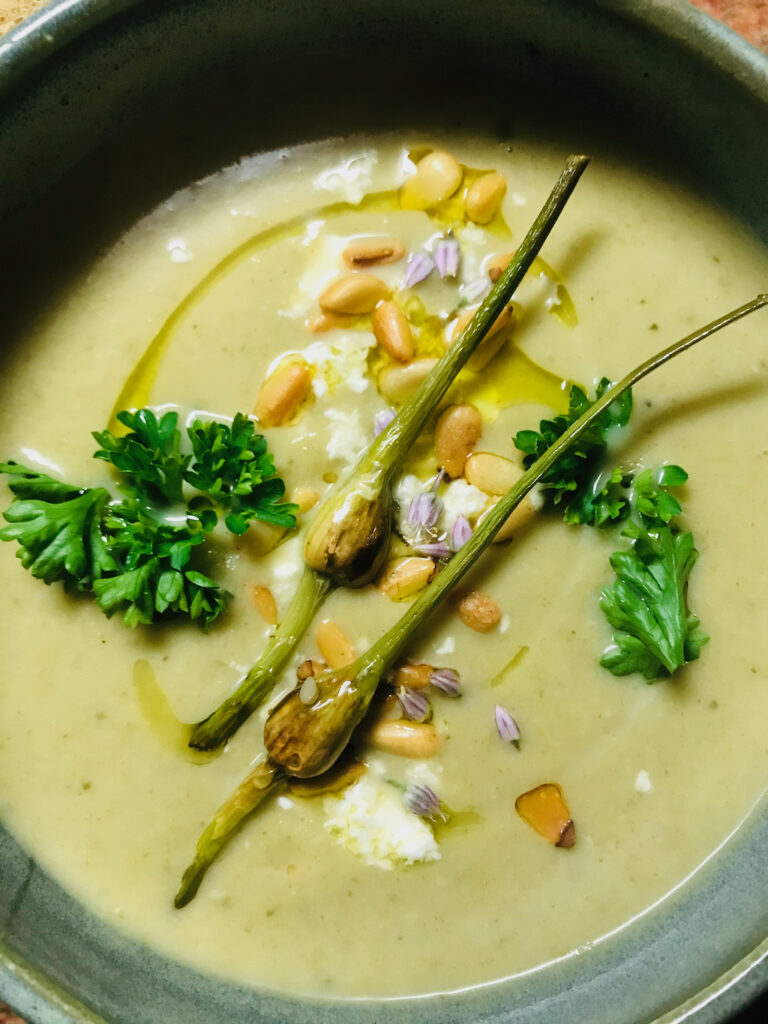
In the meantime, you can grill the baby bulbils to use as a beautiful and tasty garnish. (Cripsy Grilled Baby Garlic Bulbils is what I’ve named them, and they taste like garlic bread, without the bread or the butter. They’re amazing. Just amazing.)
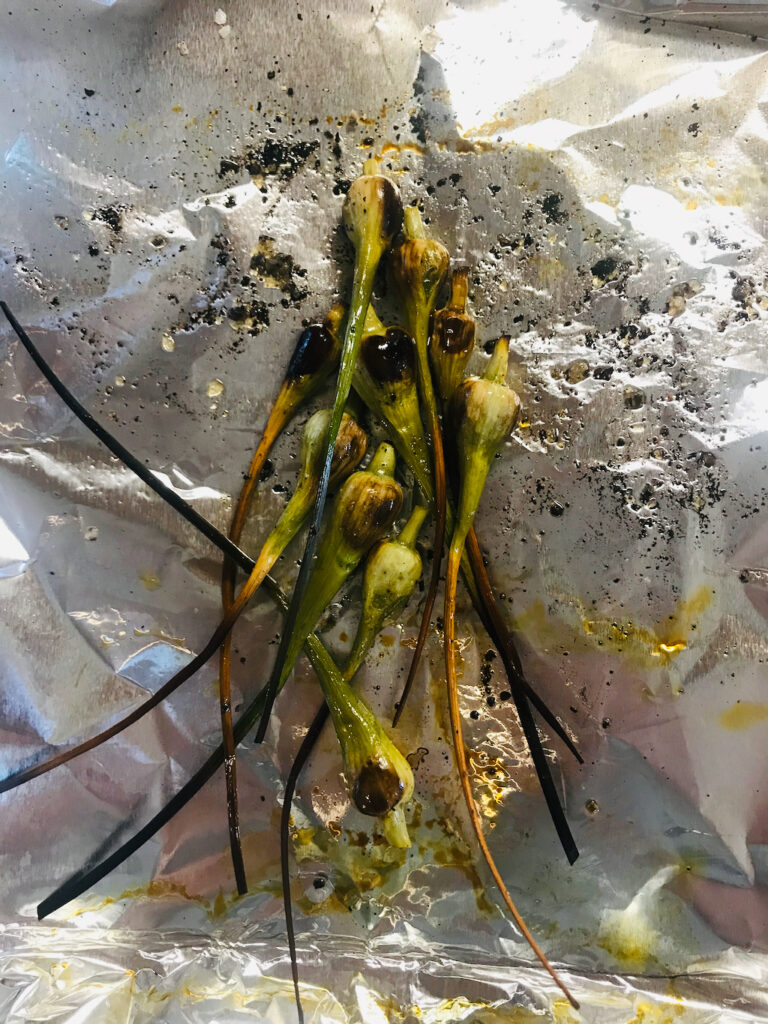
Preheat your grill to medium (about 300 or 350˚F). Give the baby garlic bulbils a little haircut, trimming off the last inch or two of the whispy tops that will tend to burn too quickly. Toss the trimmed baby bulbils in a couple tablespoons of olive oil and sprinkle with salt and pepper. Make an aluminum foil tray and lay the bulbils going in the same direction. You’ll want the thicker bulbil end towards the hottest part of your grill, for me that’s the back of the grill.


Use a cookie sheet to transport the bulbils to the grill. Grill for about 3 to 4 minutes, flip each one and grill for 3 to 4 minutes more. You may need to repeat flipping and grilling another minute or two on each side, because you want them just shy of being burned. You want the outside to be extra toasty and crispy, because that’s when all those garlic seeds on the inside cook into what tastes like garlic butter slathered toast.
Once crispy and toasty, remove from the grill and set aside. (Once cooled, feel free to taste one or two for yourself. To eat them, hold them by the tippy-top whispy end and eat the bulb part of the bulbil. Just bite it off and enjoy. Discard the whispy end.)


Check your soup and stir and poke a celery root cube here and there with a fork to see how it’s progressing regarding tenderness.
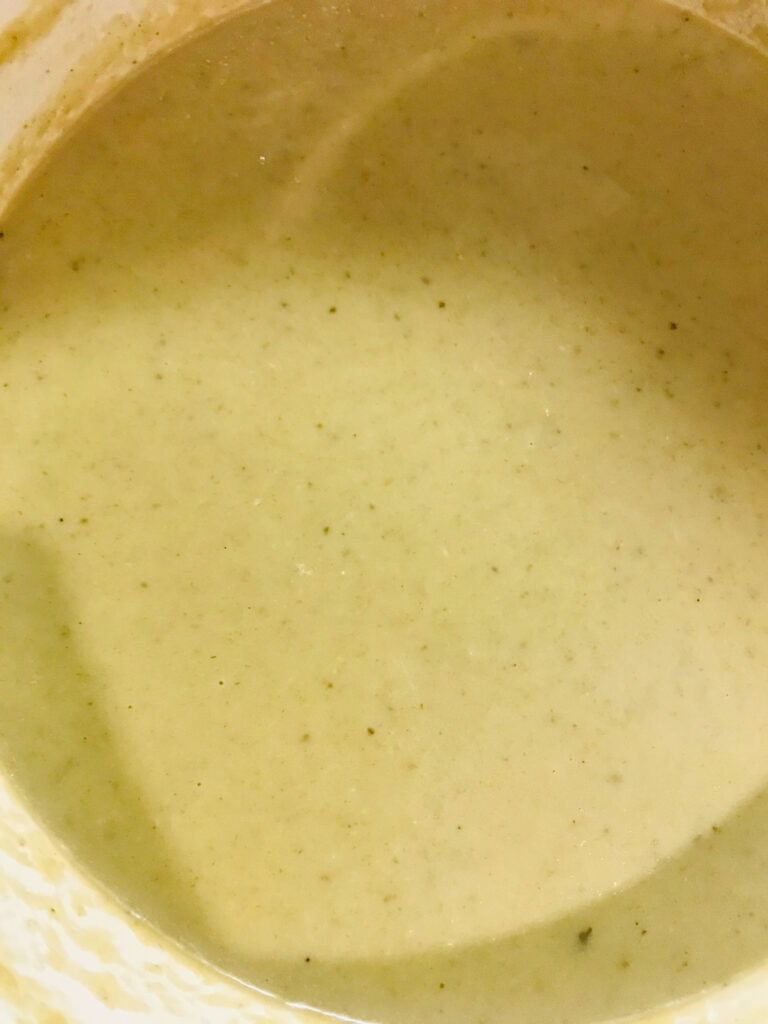
Once every celery root piece you happen to pick up is nice and pierceable by a fork, turn off the heat and remove the pot, and set aside for about 10 minutes or so. Transfer to a blender as soon as the soup is cool enough to do so. (It can still be warm, but will be a bit hazardous to blend if still steaming hot.)
Transfer as mush soup base to a blender as your blender will allow, add a little of the broth to help a blender out, and blend (in batches if necessary) until you have a very creamy texture. It will still be quite thick at this point, and the blending may take several minutes and a couple of blender scrape downs or tamper rod pushes.


Transfer the blended soup back to the Dutch oven and add the remaining broth or add enough broth to get the consistency you’d like, and stir to combine. I like mine about the consistency of a good pea soup or slightly thinner than cream of mushroom soup, for examples, but you can decide how thick or thin you think you’d like it. As a rule of thumb, I end up using the full 32 ounces of broth, and if I’ve got more on hand, maybe even another few ounces.


Turn the heat back on the burner to medium-low and reheat the soup.
While your soup reheats, prepare the rest of the garnishes and toast some crusty bread for dippin’.

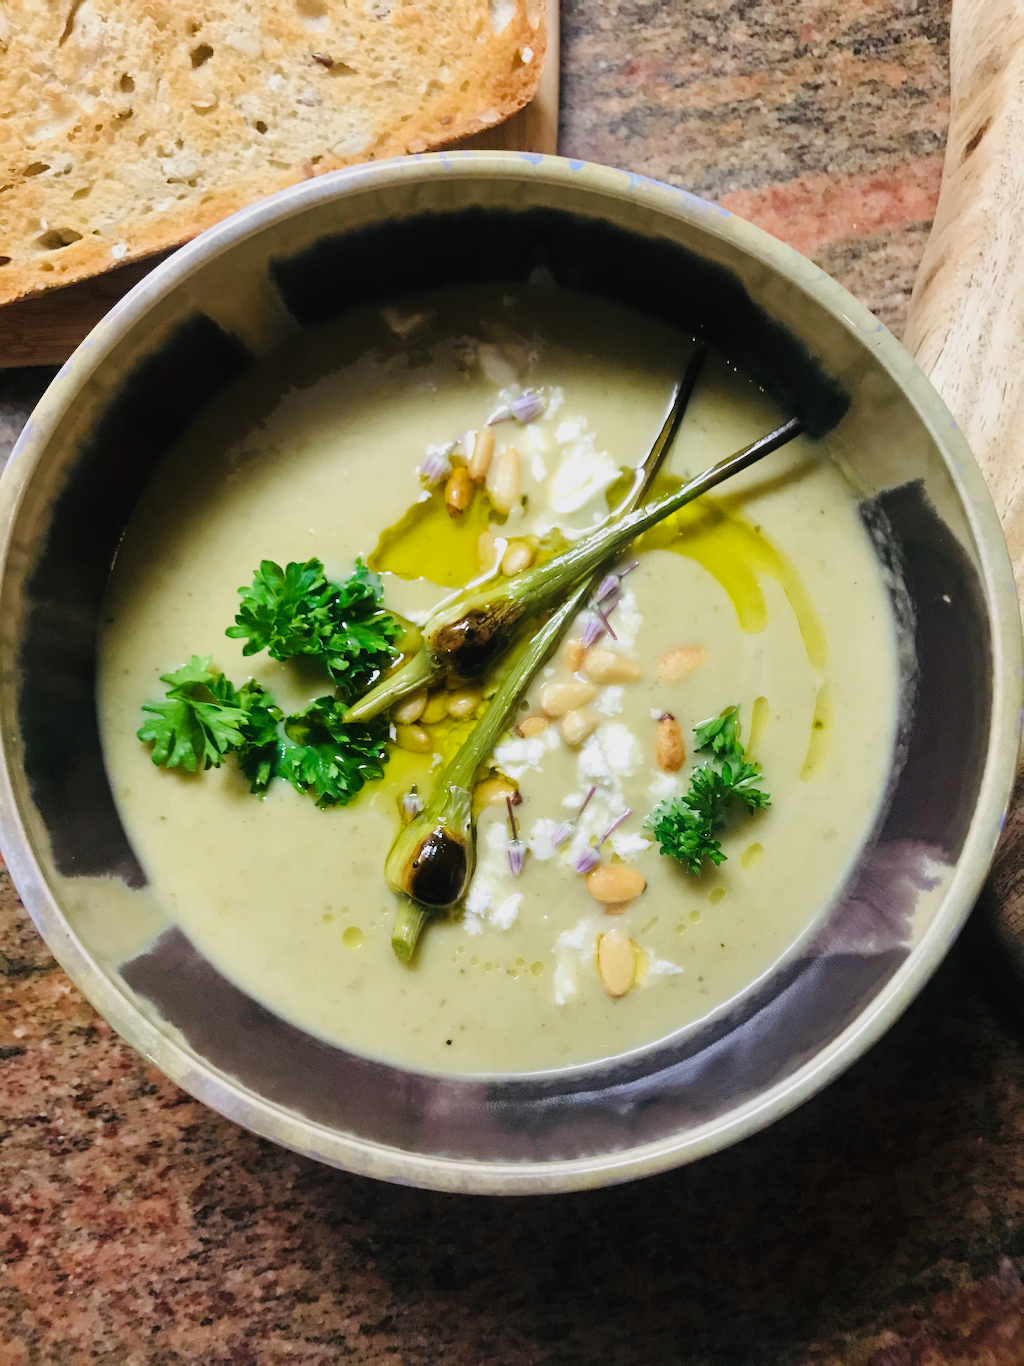
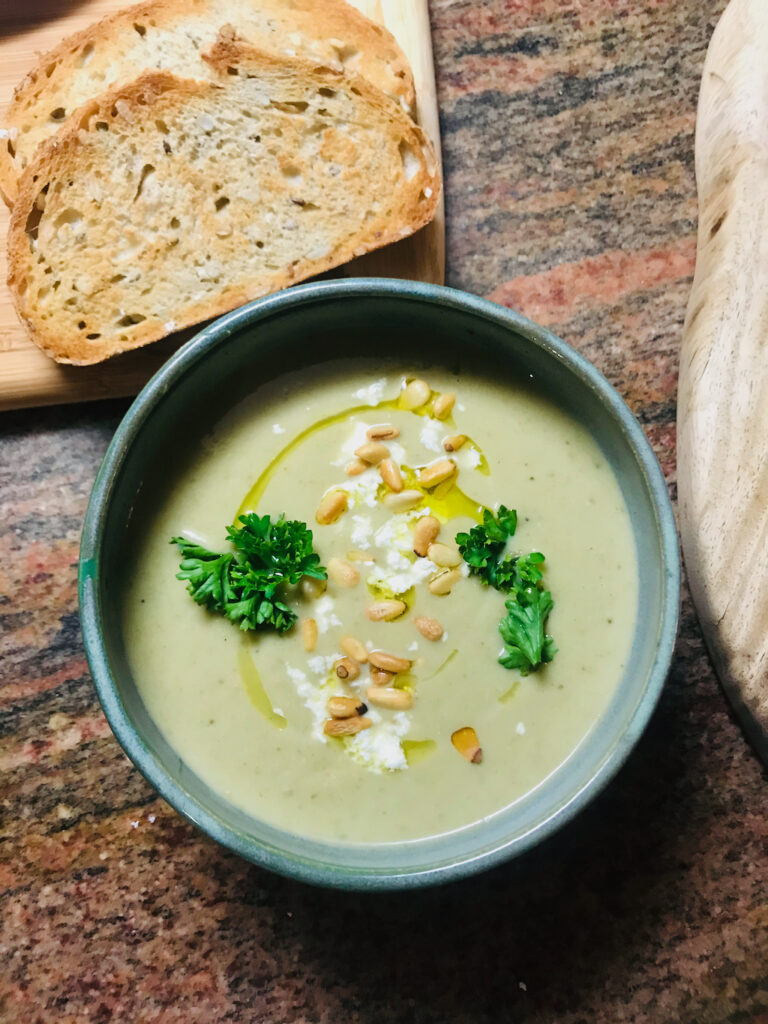
The garnishes I found really tasty and complete were: a drizzle of olive oil, a sprinkling of feta cheese, a dusting of toasted pine nuts, a few balanced sprigs of parsley, a dusting of German Giant garlic bulbil buds (for their slight crunch, purple color, and peppery taste), and last but certainly not least, some delicately laid Cripsy Grilled Baby Garlic Bulbils.
Enough talk about garnishings, let’s garnish!
Once your soup is heated, stir once more just to fully incorporate everything, just in case.
Taste for salt and pepper.
Ladle into serving bowls, and garnish as described above:


A drizzle of olive oil. And a sprinkling of feta cheese.

A dusting of toasted pine nuts.
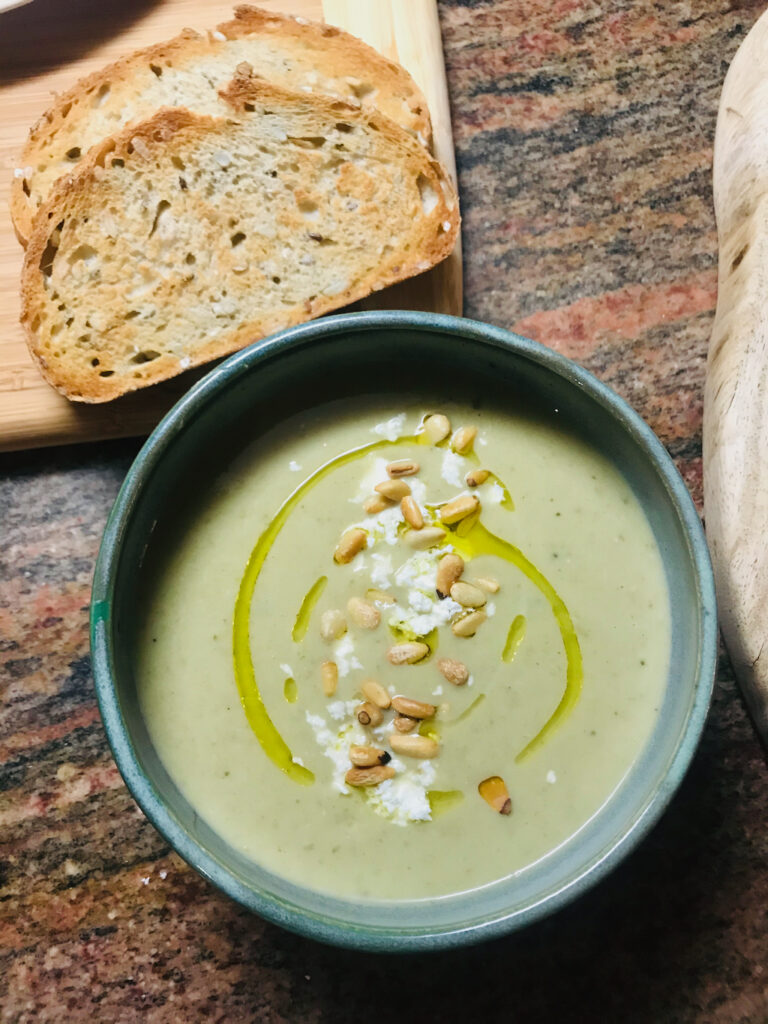
A few balanced sprigs of parsley.
A dusting of German Giant Bulbil buds, optional, if you can find them.


And a couple or few Crispy Grilled Baby Garlic Bulbils. (Mandatory.)
Serve alongside some toasted crusty bread so you give your family or guests a polite way to sop up every last spoonful.
And Enjoy!
—Becky

Download the recipe file here.