Brioche Hamburger Buns
(Jump to the recipe file here.)
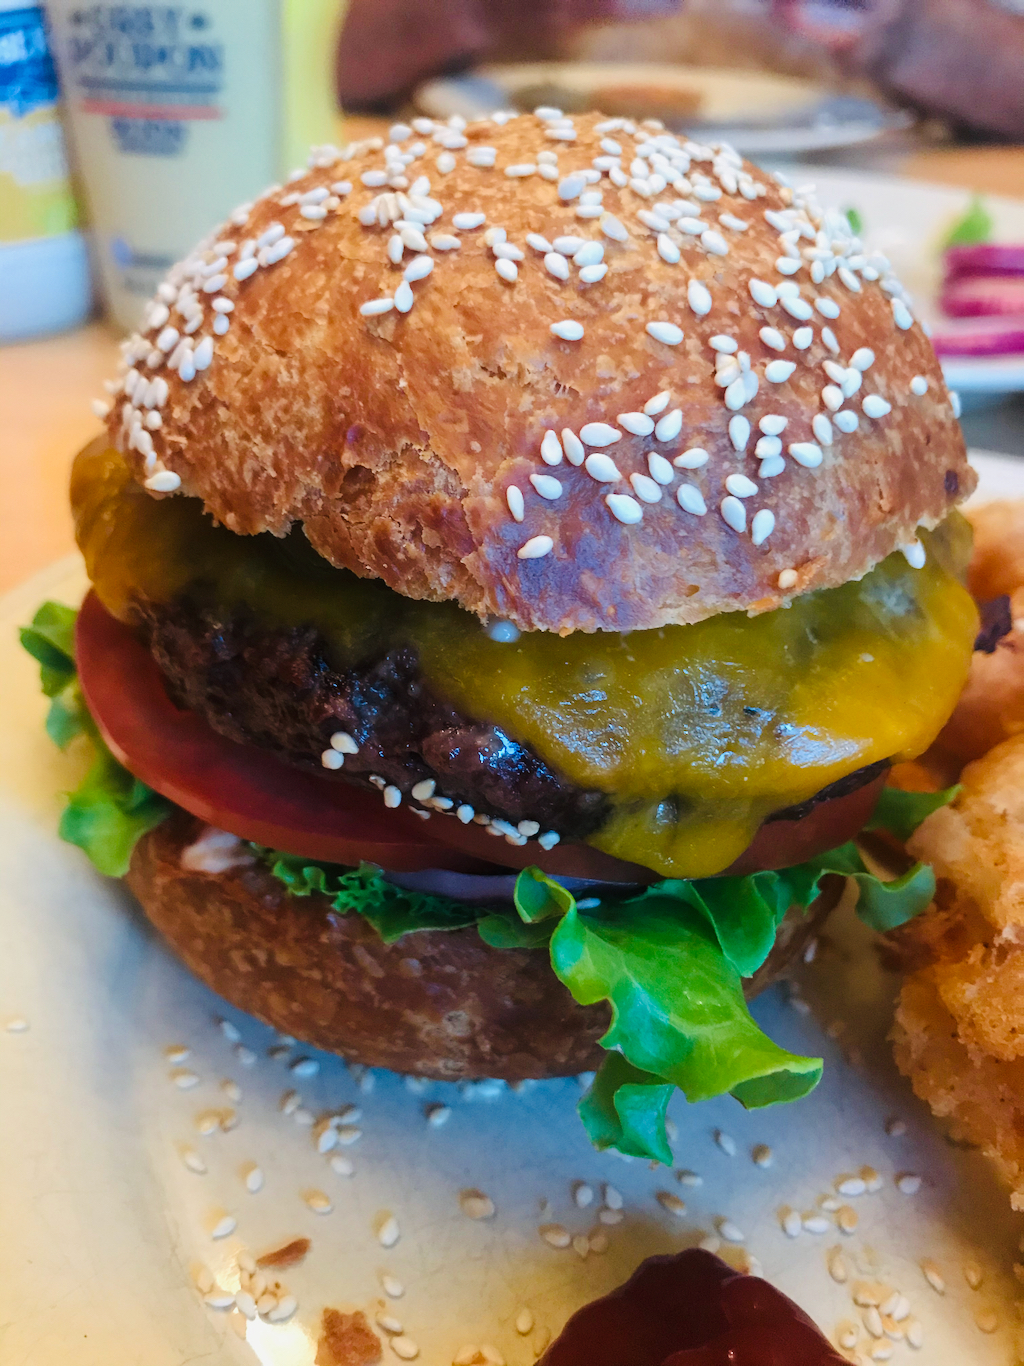
These Brioche Hamburger Buns are simply a re-shaping of the already posted Unprecocious Salted Butter Brioche recipe, but hamburger buns is such a perfect application for this bread, though it’s kind of a duplicate, it’s way worth sharing.
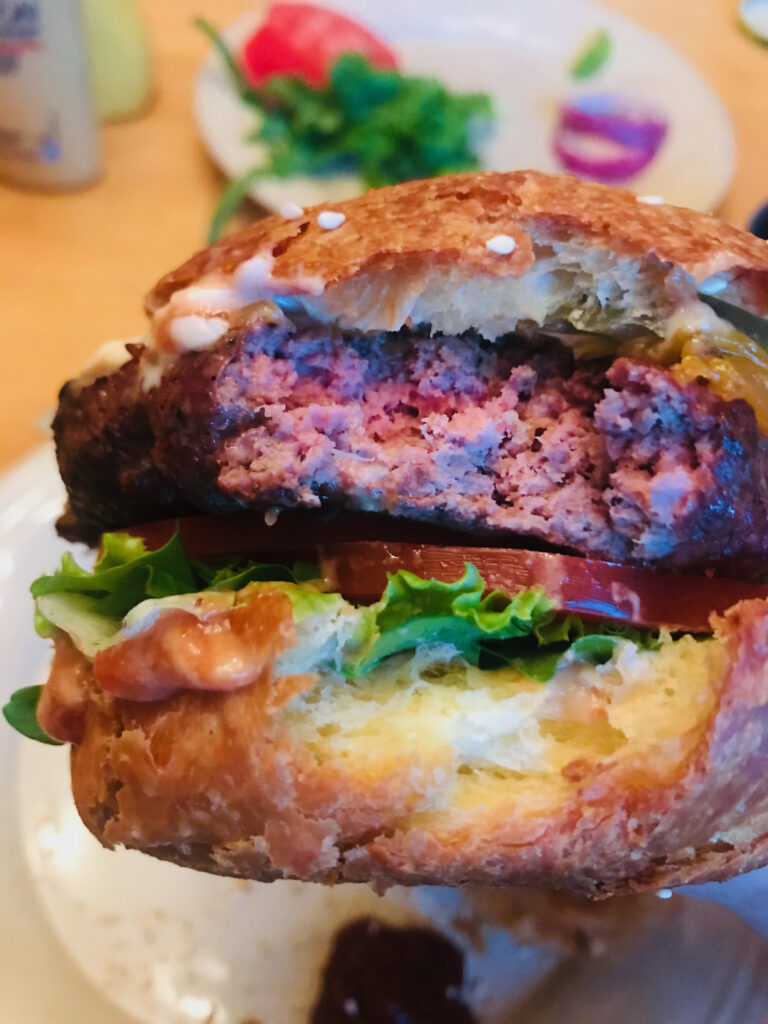
My favorite part of that brioche (besides the smell of it while baking) is the crusty crust when contrasted with the unbelievably light interior, so shaping them into burger buns gives each and every person all the crust they could want. It’s like giving eight people the end piece! It’s marvelous!


The light-and-simultaneously-rich flavor of this bread also pairs unbelievably well with ground elk meat, (and ground bison too, which may be easier to find for most east-coast folks; I can find Colorado-raised ground elk at my local City Market.) However! A friend of ours gave us several pounds of ground elk meat the other day, and so I’m making these Brioche Burger Buns to give to him before Memorial Day as a thank you, if he so chooses to grill some elk burgers of his own.


The dough takes over 30 minutes of mixing, even if using a stand mixer, and rests in the refrigerator for 8 hours (or overnight) for it’s longest rest time, so it does take its sweet time, but when it’s done, how sweet it is!
Brioche Hamburger Buns
Time to Complete:
- Active Time: 46 min
- Resting / Rising Time: 11 h 10 min
- Bake Time: 25 – 30 min
- Total Time: 12 h 26 min
You’ll Need:
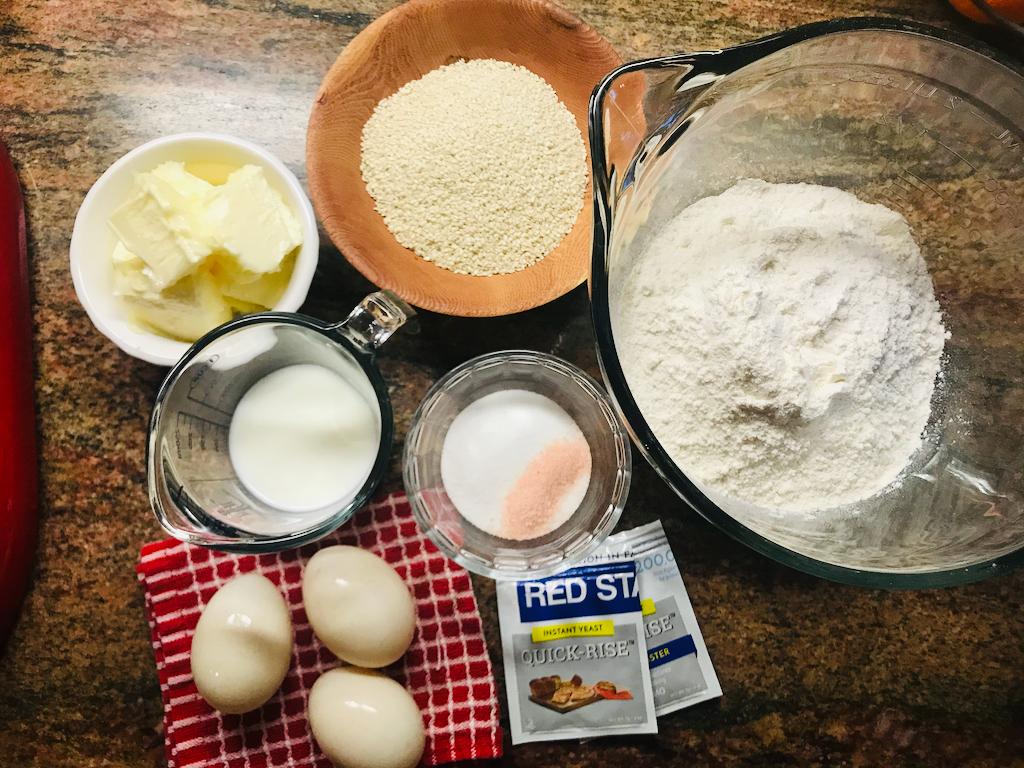
Yields 8 Hamburger Buns
- 361 g bread flour (3 cups)
- 50 g granulated sugar (1/4 cup)
- 10 g instant yeast (1 Tbs)
- 2 g salt (1/2 tsp)
- 3 eggs
- 76 g whole milk (1/3 cup)
- 170 g salted butter, at room temperature (3/4 cup)
- 1 egg + 1 Tbs water, for an egg wash
- 70 g sesame seeds (1/2 cup)
Measure the 361g bread flour, 50g granulated sugar, 10g instant yeast, and 2 g salt into the bowl of a stand mixer. Briefly whisk together to combine.


Add the 3 eggs and then the 76g whole milk.


Mix on low with the dough hook attachment for about 2 – 3 minutes. Once the eggs are broken up they and the milk are beginning to be mixed into the flour mixture, increase to medium-low and mix another 2 – 3 minutes.


At this point I find I need to scrape the bottom of the bowl with a rubber spatula to help my mixer out. (My mixer can’t quite get to the bottom of things.)


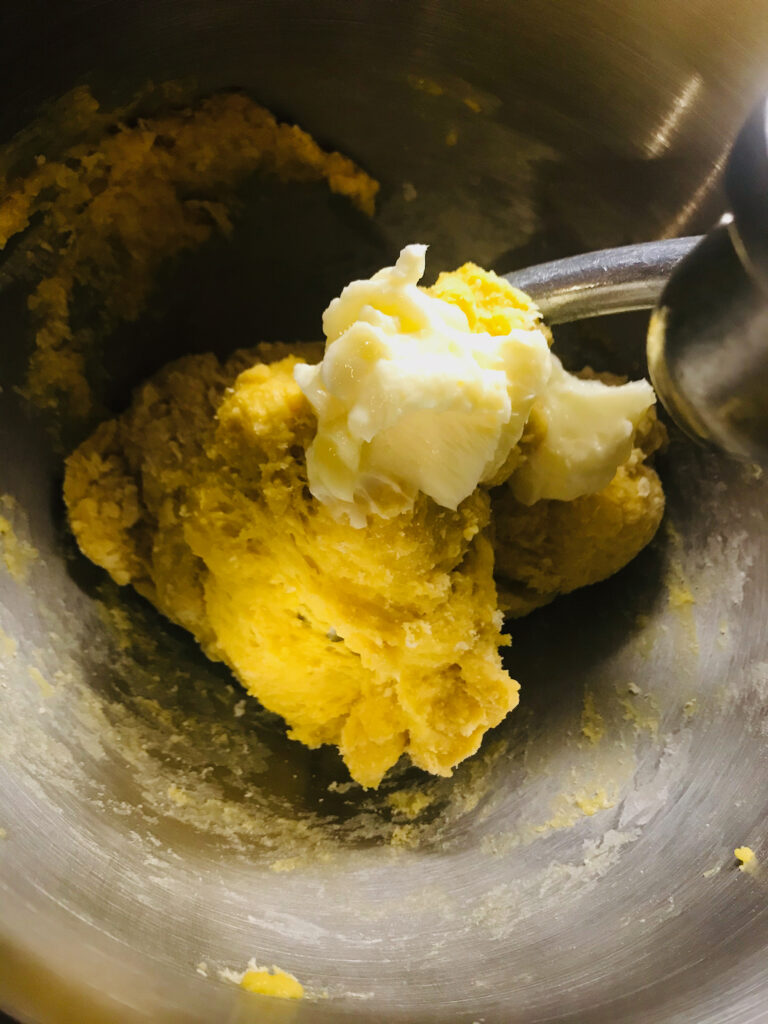
Once everything has come together and looks like a dough, begin adding the salted butter about a tablespoon or two at a time. Mix on medium speed while adding.
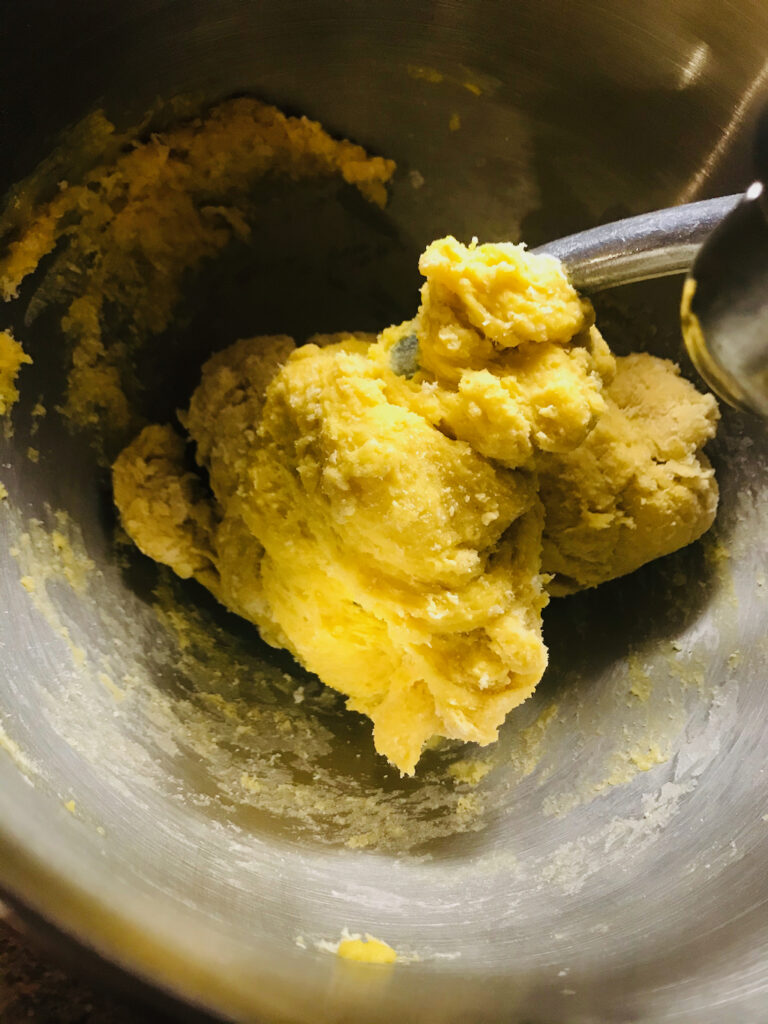
Once each couple tablespoons are mixed in, add the next couple tablespoons.


I also need to stop my mixer and scrape the bottom of the bowl with a spatula with each addition.

Once all of the butter has been added (and this takes at lest 10 minutes to add and mix all of the butter in) keep mixing the dough another 5 minutes or so, until all of the butter has been evenly mixed into the dough.
Also know that this dough is very sticky through the whole process.


[At the end of what I figured was the maximum that my mixer could do, because this dough is so sticky and my dough hook can’t always pick up and really knead the whole mass, especially when the weather is warm, I removed the bowl from the mixer and kneaded right in the bowl with my hands just until I couldn’t feel any lumps of dough that I could tell hadn’t mixed with the butter. The dough should be smooth, though sticky; it shouldn’t have any really firm clumps of dough-pre-butter.]


Once the dough is fully mixed, lightly butter a bowl and transfer the dough to the buttered bowl. Cover with a dish towel and let rest at room temperature for 1 hour.


After 1 hour, cover with plastic wrap and place in the refrigerator for 8 hours, or overnight.


The next day, remove the dough from the refrigerator for about 5 minutes, covered or uncovered, it doesn’t matter.
Line a baking sheet or two with parchment paper and have them handy.
Pour some sesame seeds into a shallow bowl.


On a lightly floured surface, and perhaps with lightly floured hands, remove the dough from the bowl, squish the whole thing together, then pat it into a rectangle.


Cut the rectangle into 8 equal portions.

Now, you can eyeball this, and that’s just fine, but a kitchen scale is really handy for this part, because this recipe makes 8 burger buns that are approximately 3.5 ounces each.


[The first time I made this bread as burger buns, I just measured out 3 hamburger buns’ worth of dough and then rolled the rest of the dough into a loaf and baked it too. That time I made the 3 burger buns 4.5 ounces, and they were quite big. I think 3.5 ounces is a pretty good size. If making yours 3.5 ounces, this recipe will yield 8 burger buns.]


Once you’ve got your dough divided, grab the edges and pinch them into the center of the dough, sort of kneading the outer edges into the middle. This will give you a tight, uniform ball. Then, to get an even tighter uniform ball, flip the ball over, seam-side down, and roll your cupped hand over the ball for about 10 seconds. This should give you a good little sphere.
If while rolling with a cupped hand and forming the sphere, your dough sticks to the counter, have some flour handy to very lightly flour the countertop. A bench scraper or a palette knife also helps release the sphere from the counter (as in the video titled “sticky little bugger.”)
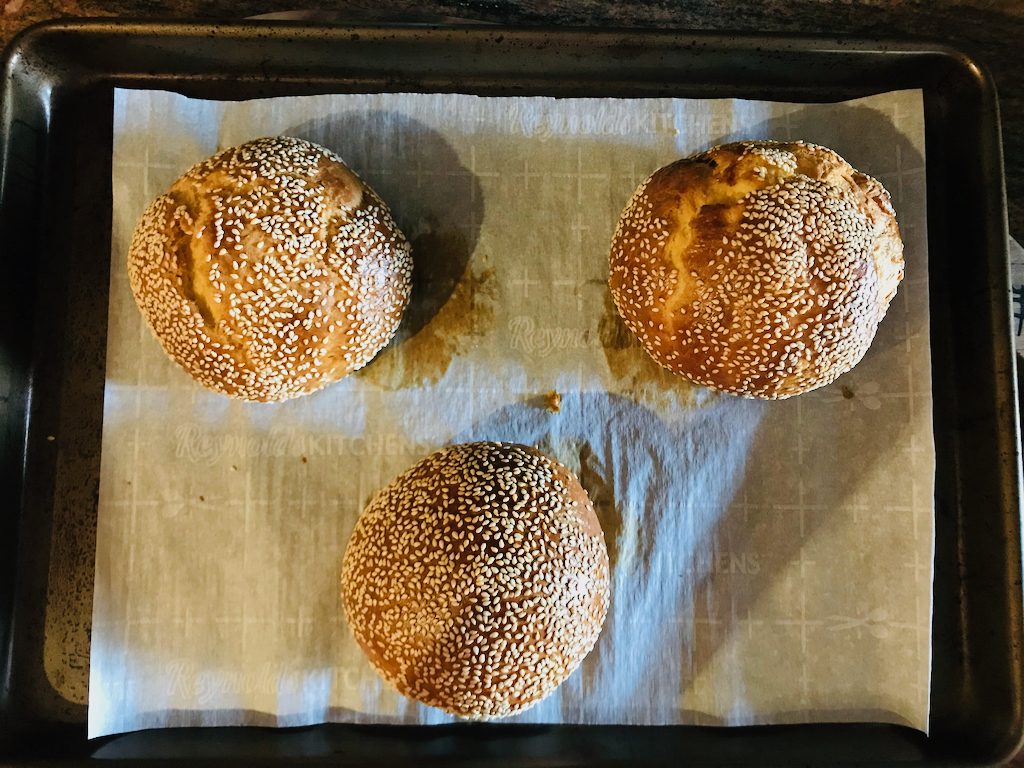
Once each ball is shaped, place on a parchment-lined baking sheet. Continue shaping all 8 buns.


Next, lightly brush a sheet of plastic wrap with a neutral-flavored oil. Place the plastic wrap over the bun-spheres and place in the refrigerator for about 5 minutes. (This will chill them briefly so that you can give them one more roll-around in your cupped hand which gives them a nice, tight shape.)


After 5 minutes remove the tray of buns from the refrigerator and carefully remove the plastic wrap because you’re going to use it one more time.
Beat 1 egg with 1 tablespoon of water for an egg wash.

Using the cupped-hand rolling method, briefly re-roll each bun, brush the top with egg wash and dip the tops in sesame seeds before you place it back on the parchment-lined baking sheet.
(Do as I say not as I do.)
(There’s no photo of the egg wash this time, because I didn’t do it, but trust me on this one, brush with egg wash, then dip is sesame seeds, then brush with egg wash again. You’ll thank me and yourself if you’re not eating these burgers outside!)


Once each bun is placed on the tray, brush each sesame-coated top lightly with egg wash once more to help the seeds stay in place after baking. (If you skip the egg wash, the sesame seeds just roll right off that flaky top crust, which makes a mess… which I found out the hard way.)
This is also a good time to place each bun at least 2 inches apart on the baking trays.
(Otherwise, you’ll need to transfer them to another pan after their final rise, just before baking, like I had to. …I did, however, only need to oil one sheet of plastic wrap, so I guess, pick your battles: either carefully transfer proofed buns later, or oil 2 pieces of plastic wrap. Pick whichever you’d like to do the least, and do the other. 😉 )


Once each bun is re-rolled, egg washed, dipped in sesame seeds, and placed 2 inches apart on the baking sheets, cover them once again with lightly oiled sheets of plastic wrap and let rise at room temperature for 1 ½ to 2 hours. This rise time is the primary rise, so do give them this time. (Note: They rise about 1 ½ times their size, not quite doubling.)


Nearing the end of the final rise time, preheat your oven to 375˚F.
Bake for 25 to 30 minutes.


Allow finished buns to cool on the baking tray for about 2 to 3 minutes, then, if you’d like, transfer to a cooling rack to cool completely. (I happen to particularly like the crusty crust of this bread, so I often let the buns cool completely on the baking tray, since it doesn’t hurt the bottom crust at all.)
And enjoy burger day!
—Becky


(Download the recipe file here.)