Palmiers
Flaky, sweet, crispy. Some call them cookies, but I don’t like that description. They’re so much more than a cookie, and so much simpler (once you’ve got the puff pastry, that is.)
(Jump to the recipe file here.)
I do, and forever will, think of these as a logical conclusion to having made puff pastry.
It uses about half the dough of one recipe, which makes about 1 dozen Palmiers, which is the perfect number. These things are like Mary Poppins: positively perfect in every way.
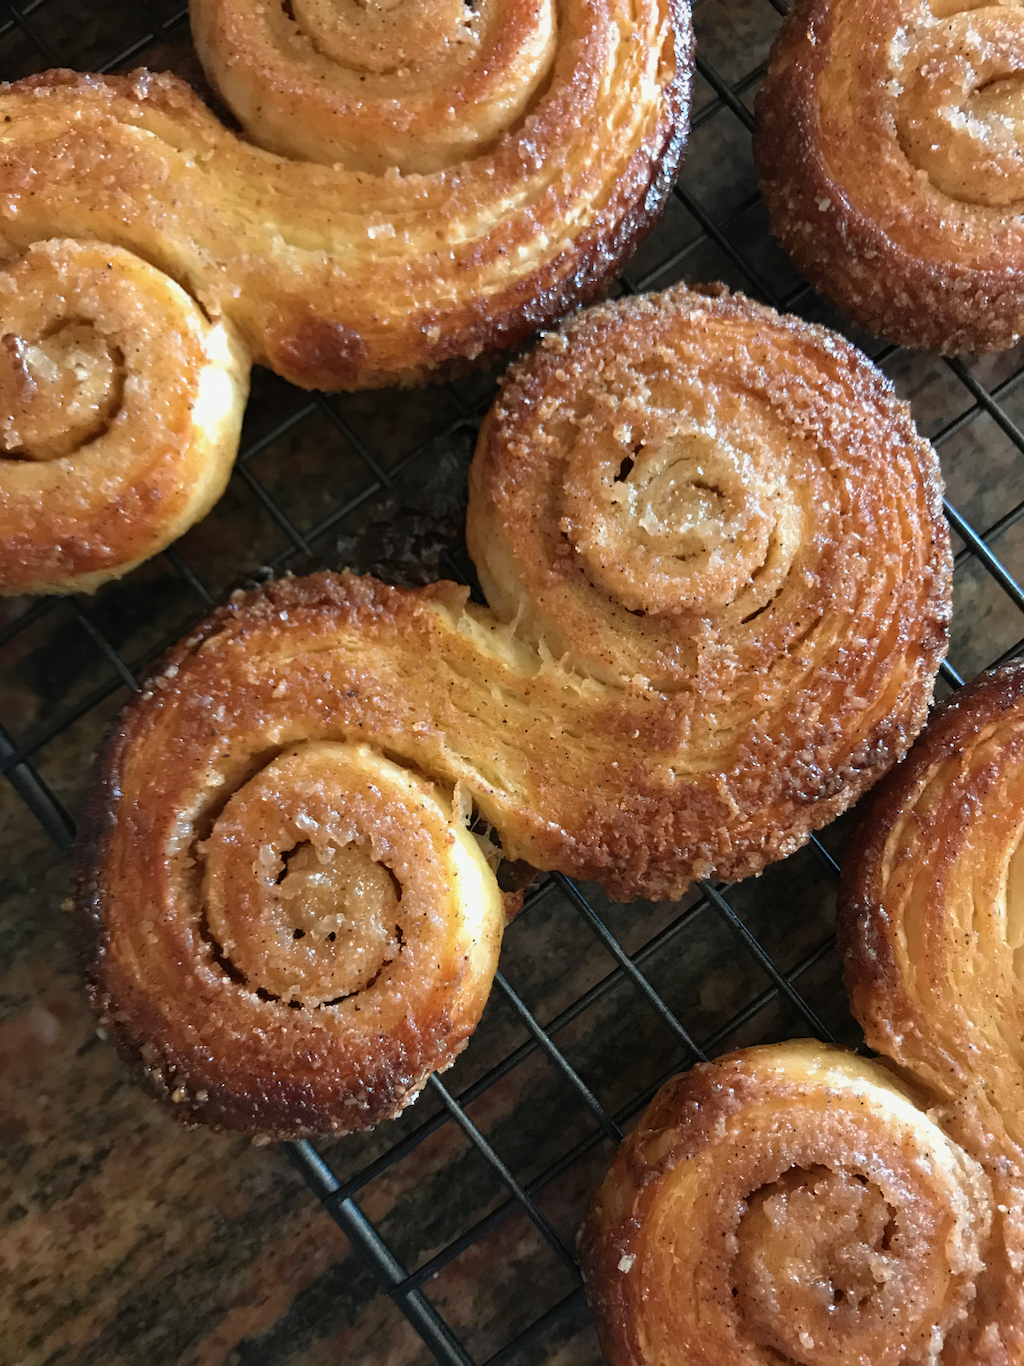
Speaking of perfection, you may notice one little difference in my pictured Palmiers, and that’s the shape. Traditionally they are either folded, in quarters towards the center, then in half, then sliced, or they are rolled, each edge towards the center until they meet, then sliced. This shaping is where the pastry gets its name, because it looks like a palm leaf, or an Elephant Ear (the plant leaf, not necessarily the animal.)
Since Palmiers are the simplest way to use such a complicated dough (but so fun to make!) as Puff Pastry dough, I wanted to showcase how delicious these little gems are. I wanted to visually show, instantaneously and unarguably, how perfect these things are.
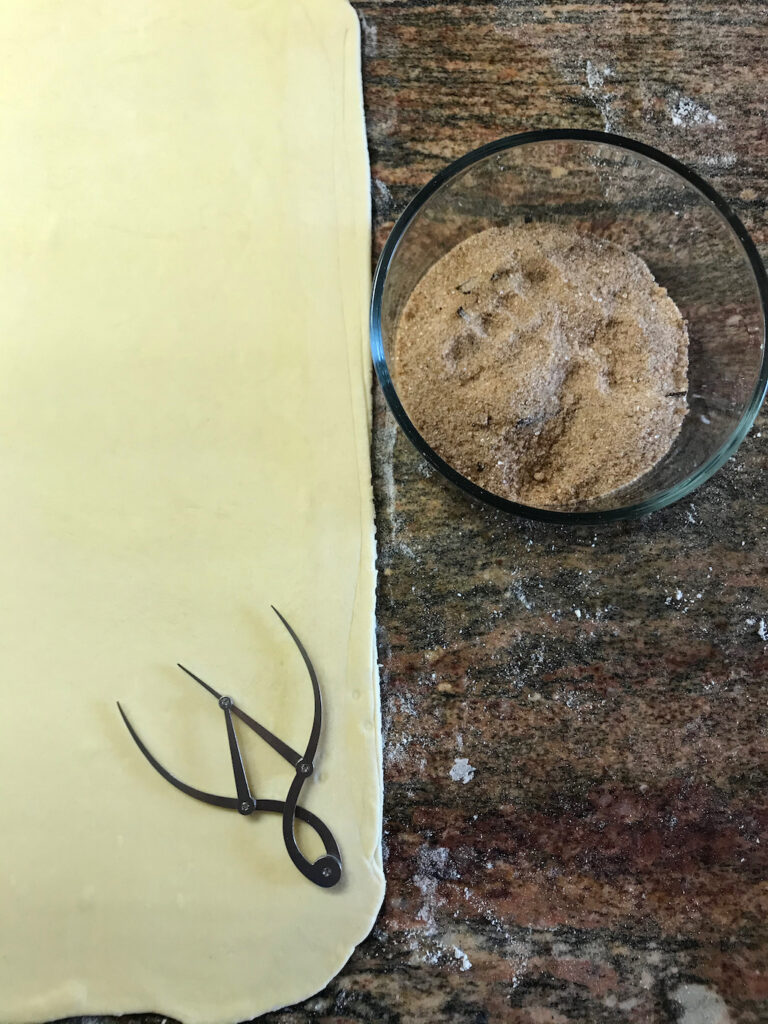
And so I broke out my handy-dandy Phi compass, which finds the golden ratio for you, (you know, the lean and mean ratio of the longer segment to the shorter segment with the sum of the segments to the longer segment.) Long story short: it’s that sweet spot where the balance of things are mathematically, irrefutably beautiful.
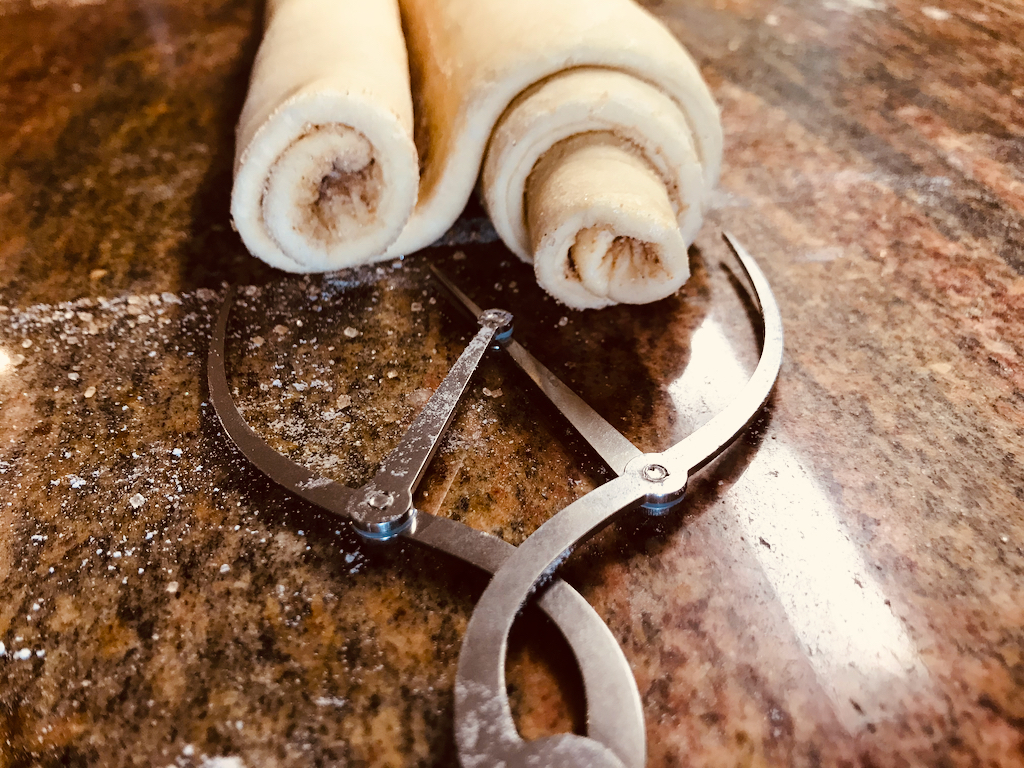
If you think you don’t have a Phi compass, you’re wrong, your body and soul is a Phi compass, meaning, you’ll know the beauty when you see it, so you can still roll your Palmier this way without the gadget.
Let’s get to it.
Palmier
You’ll need:
- One half recipe of Puff Pastry dough*
- About ¼ cup Vanilla Spiced Sugar**
*See my blog post on Puff Pastry for step-by-steps on how to make your own; use one half of the recipe. The other half can be used in any number of other recipes or can be frozen for at least 3 months. If using store-bought puff pastry, simply thaw one sheet for approximately ten minutes, and you’re good to go.
**See also my blog post on mixing together the Vanilla Spiced Sugar. If you’d like to skip making Vanilla Spiced Sugar, simply mix 1/8 cup of granulated sugar with 1/8 cup of turbinado sugar.
Begin by rolling the puff pastry dough. On a lightly-floured surface, roll the dough to a rectangle about ¼ inch thick.


If starting with frozen puff pastry dough, allow to thaw at room temperature for about 10-15 minutes, until the dough becomes just colder than room temperature, but will be rollable.
Square up any edges as best you can to get your ¼-inch-thick dough back into a rectangle. A pastry scraper or a bowl scraper works really well for squaring corners and straightening edges… but then again, so do your hands. You’ve got options!
Pour your Vanilla Spiced Sugar into a flat-bottomed bowl if you’ve got one. (This recipe won’t use quite all of the sugar, but any leftover can be stored nearly indefinitely in a sealed jar at room temperature in your pantry. It can also be used to add depth to Sable Breton, little French butter cookies.)


Spread 4 to 5 tablespoons of sugar over the bottom two thirds of the dough. Use a rolling pin to really adhere the sugar into the dough. Wipe any sugar that has stuck to the rolling pin back onto the dough and press a little bit with your hands to get the sugar stuck into the dough.


Roll the bottom edge up towards the top stopping where the sugar coating ends, keeping the roll as tight as you can, but no need to be really finicky because any space that does end up being in your roll only gives the pastry even more room to rise, it does however, allow the sugar coating to leak out a bit. So find a good balance of a tight roll. I rolled these pretty tightly.


Next, and this may be the hardest part of the entire recipe, flip the entire log over. Then spread 3 to 4 tablespoons of sugar on the other side of the dough, which is the un-rolled one third of dough.


Use a rolling pin to press the sugar into that section of the dough, then wipe any sugar from the rolling pin, then use your hands to press and even out the sugar a bit more.
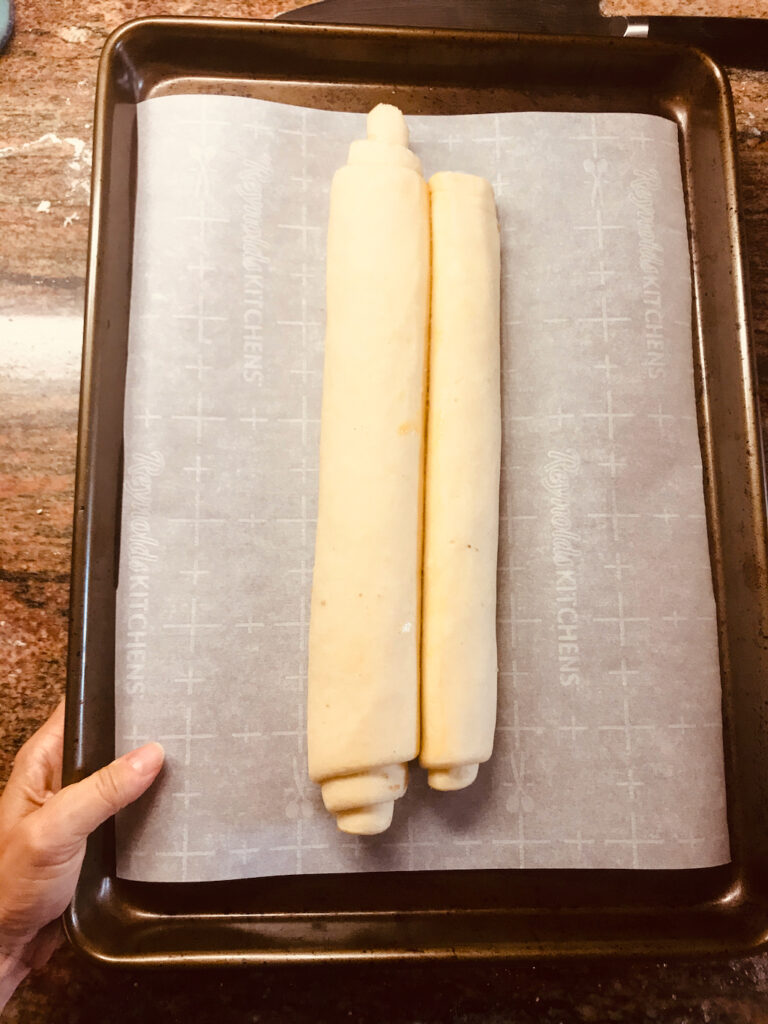
Tightly roll that third of the dough rectangle up to meet the other rolled portion.


Now you have two opposing rolls.

If you’d like, you can brush a little bit of egg wash (which is 1 egg beaten with 1 Tbs of water) and, using a pastry brush, brush the egg wash in the seams of the two rolls. Gently press the rolls together.


If you don’t want to make an egg wash, but you still find you need something to press the seam together, you can brush with a tiny bit of water and then press the rolls together. Here’s a tip though: if you do decide to make an egg wash, you can use some of it later to help the sugar stick.
Transfer the entire log to a parchment-lined baking sheet and chill in the refrigerator for 10 to 15 minutes. (This will help them slice neatly.)
Remove from the refrigerator and preheat your oven to 450˚F.
Transfer the spiraled log to a cutting board and use a sharp chef’s knife to slice off both uneven ends. (You can keep those ends and bake them; the odd ends of Croissant dough and these Palmiers are my daughter’s favorites. She loves the misfit pastries 😉

Cut the log into slices ½ inch thick.
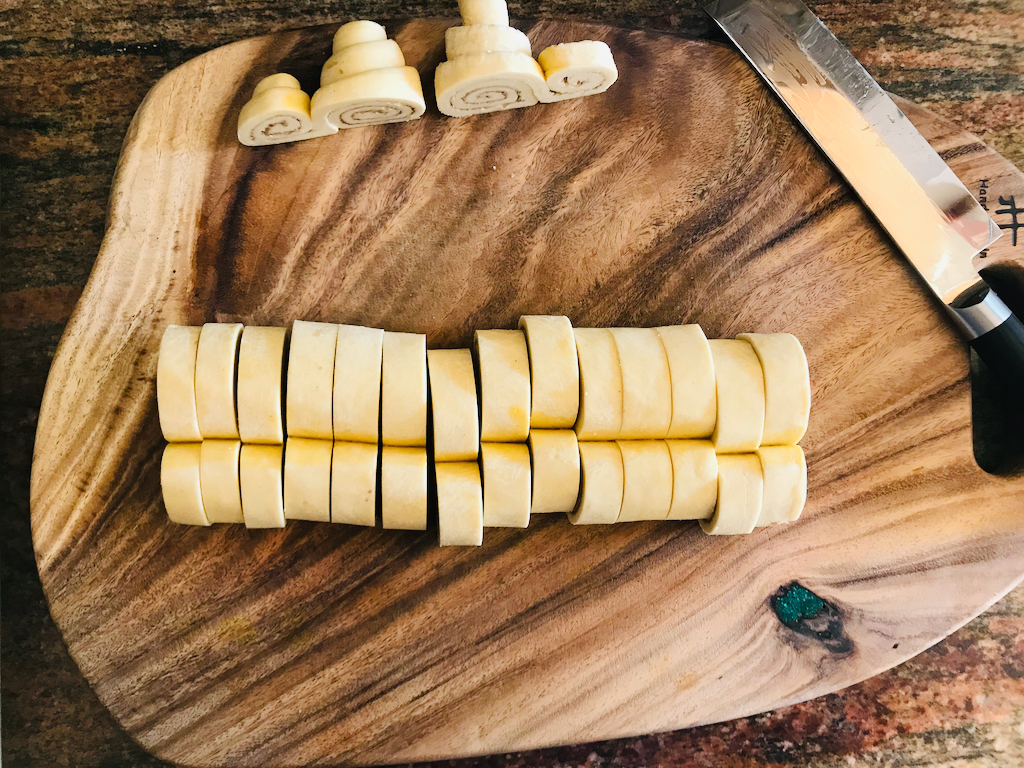
If you’ve got a flattened edge from the log’s chilling time in the fridge, once sliced, you can just press any flattened spiraled bits back round with your hand.


Dip each spiral in the Vanilla Spiced Sugar and toss, coat and sweep the sugar to coat all sides.


Here’s my personal tip: if you’ve made that egg wash for sealing the edges together, you can use some more of it now to brush along the outside edges to help the sugar coat to those smooth outer edges, making really nice crystalized, caramelized edges when baked.
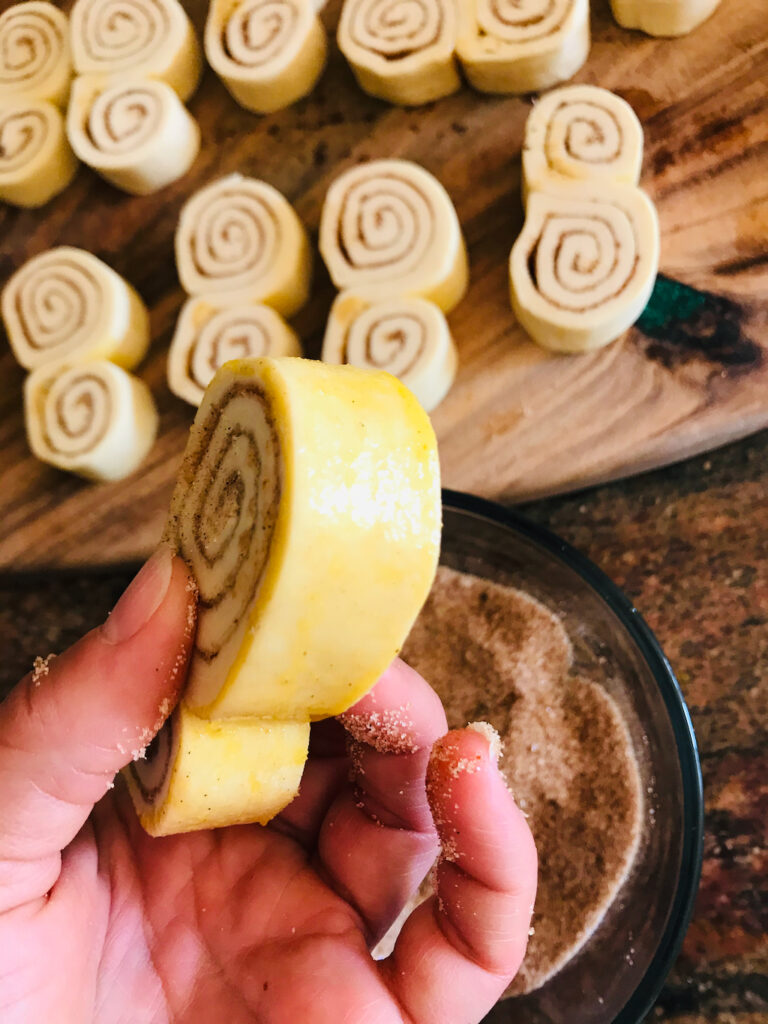
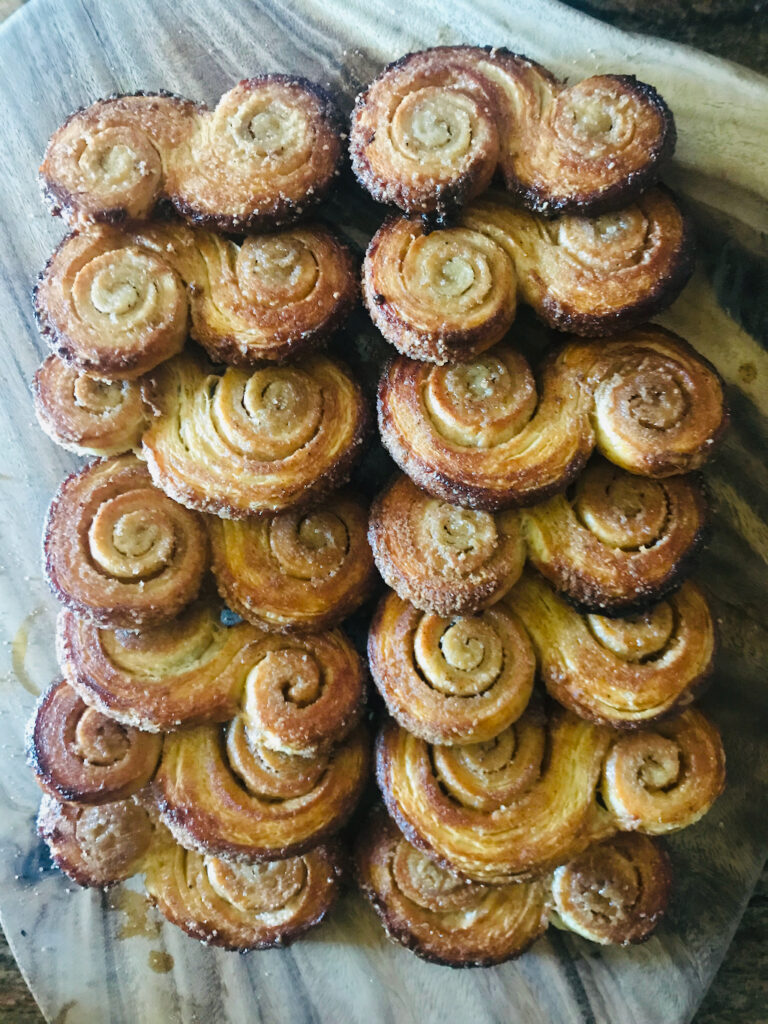
As you coat them one by one, place each coated, “Phi-utiful” Palmier on your already-prepared parchment-lined baking sheet, about 2 inches apart from one another, (because these do puff.)


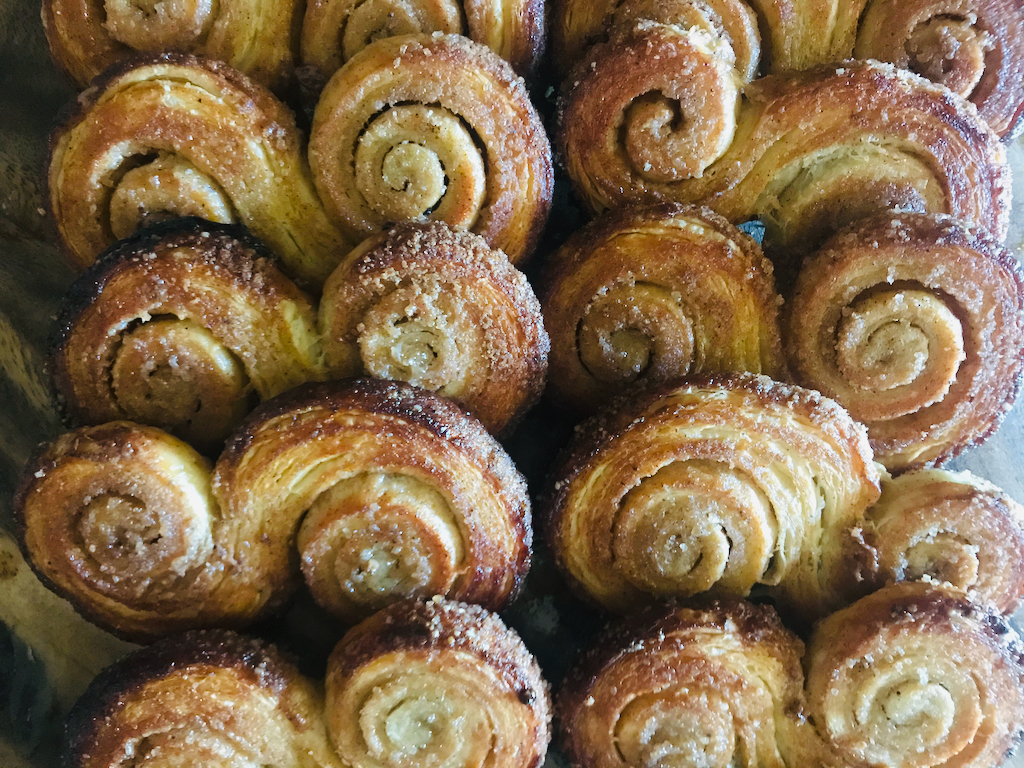
I think they look like violin scrolls once baked.

Speaking of baking, you will bake these one tray at a time, for a total of 20 minutes, but here are some other helpful things I’ve figured out: I like to flip them half-way through baking but also rotate the pan halfway through that halfway time. In sane-people words: Bake for 5 minutes, rotate the pan and bake for another 5 minutes, then flip each Palmier and bake for another 5 minutes, then rotate the pan and bake for a final 5 minutes. 20 minutes in total.
(I wouldn’t want you to get bored while baking your Palmiers, but all the tray turning and flipping gives that perfect crisping, browning and caramelization.)
Allow the baked Palmiers to cool on the baking tray for about 2 minutes, then remove to a cooling rack to cool completely.


These are best enjoyed the day they are baked. (Who am I kidding, these are ridiculously, gloriously delicious the day they are baked. “Best enjoyed” doesn’t even begin to cover it.)
If however, you have some leftover, seal in a Ziploc bag or other airtight container (do be sure they are completely cool before sealing), and! here is another really handy tip I came up with: Make a little foil pocket out of aluminum foil, and you can crisp them right back up in your toaster and enjoy them warm! While I have to admit, they are not the same as the day they are baked… because nothing quite compares to these Palmiers the day they are baked… they are still really delicious re-crisped for another 2 to 3 days, depending of course on your climate: 2-3 days in Moab, 1-2 days tops in Atlanta in August 😉


(I haven’t tried this yet, but I’ll just bet these could be frozen before baking, especially before the final sugar coating, on a flat baking tray, then wrapped in plastic and stored in a freezer bag. Thaw for 20 minutes at room temperature, then continue with coating then baking. This works with formed, rolled croissants, and I cannot see why it wouldn’t work with Palmiers. When I try this with the next batch, I will update this post with the results. –>Typing this into the post is my reminder to myself.)
If you bake them all and eat them all, or bake them all and eat half and re-crisp the other half in the toaster, I hope you’ll…
…Enjoy!
–Becky
Download the recipe file here.