Puff Pastry
(Jump to the recipe file here.)
Puff Pastry
Homemade.
Need I say more?
Nope, I need not say more. It’s something I’ve wanted to try my hand at making at home for a long, long time. And I cannot be the only one.
It’s a little bit time-consuming, but not really so much to stop you from trying it. I’ve made 2 batches this week, one for this post, and one for a video version of this post. I still got the kid to school on time, checked in to make sure she didn’t just eat garbage for breakfast, fed the ducks, cleaned up after the ducks, had dinner on the table each night, managed to sweep the house and clean one bathroom, did payroll paperwork for the hubbie’s business, drove the hubbie to and from and to the airport (which are all day trips), (oh, and tried to learn to shoot simple video and start to learn editing on my nearly-at-full-capacity, circa 2013 MacBook), much of this while not using any indoor plumbing because our in-line water filter cracked while Kevin was out of town, yadda, yadda, yadda. I say all of this to illustrate that the most time-consuming thing I did all week was not making puff pastry, far from it.
If you’d like to try your hand at making it, you can! You absolutely can do it!

Whenever trying out a new thing, I always reference several really reliable cookbooks that I have, namely The Joy of Cooking and for pastry specifically, I reference The Fundamental Techniques of Classic Pastry Arts. But, since this is the 21st Century, I also reference a few websites and blogs and YouTube channels, namely Pstrieslikeapro.com and Bake It Up A Notch, and for puff pastry, I also checked in on Zoebakes.com. After referencing each of those places, here’s the recipe I decided on (and I discuss some explanations for why and which ingredients with each step in tutorial below):
Puff Pastry
You’ll Need:
For the Dough Layer(s)
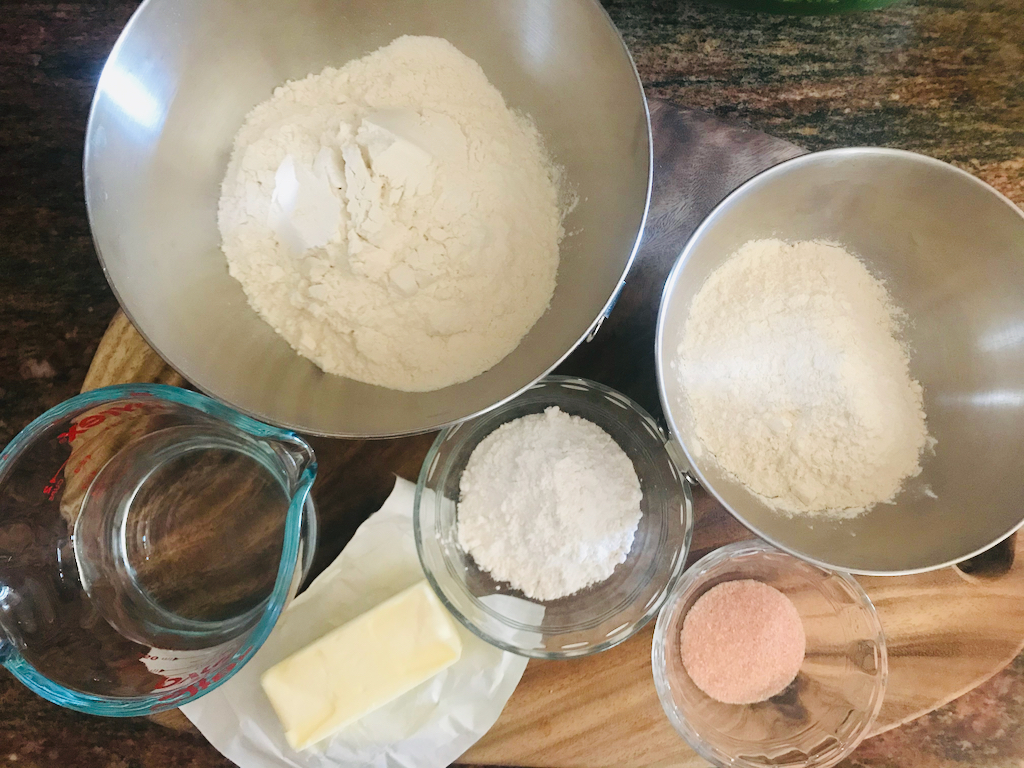
- 400g bread flour (3 ½ cups)
- 150g all-purpose flour (1 cup)
- 50g cake flour (scant ½ cup)*
- 12g salt (1 ½ tsp)
- 113g butter, at room temperature (1 stick, or 4oz.)
- 290g cool or room-temperature water (1 cup + 3 Tbs)
*If you don’t have cake flour, and don’t want to pick some up just for trying out puff pastry, simply increase the amount of all-purpose flour to 200g (1 ½ cups).
For the Butter Layer(s)
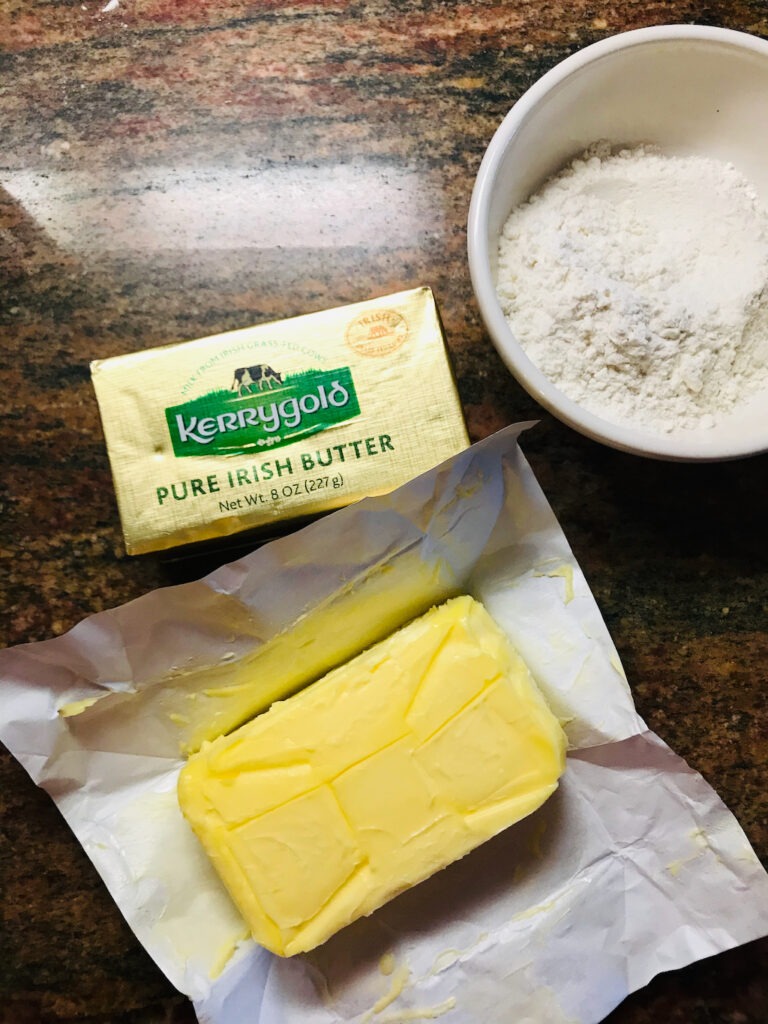
- 453g good-quality, high-fat, unsalted butter, at room temperature (4 sticks, or 16oz.)
- 70g bread flour (1/3 cup)
Start by making the dough layer.
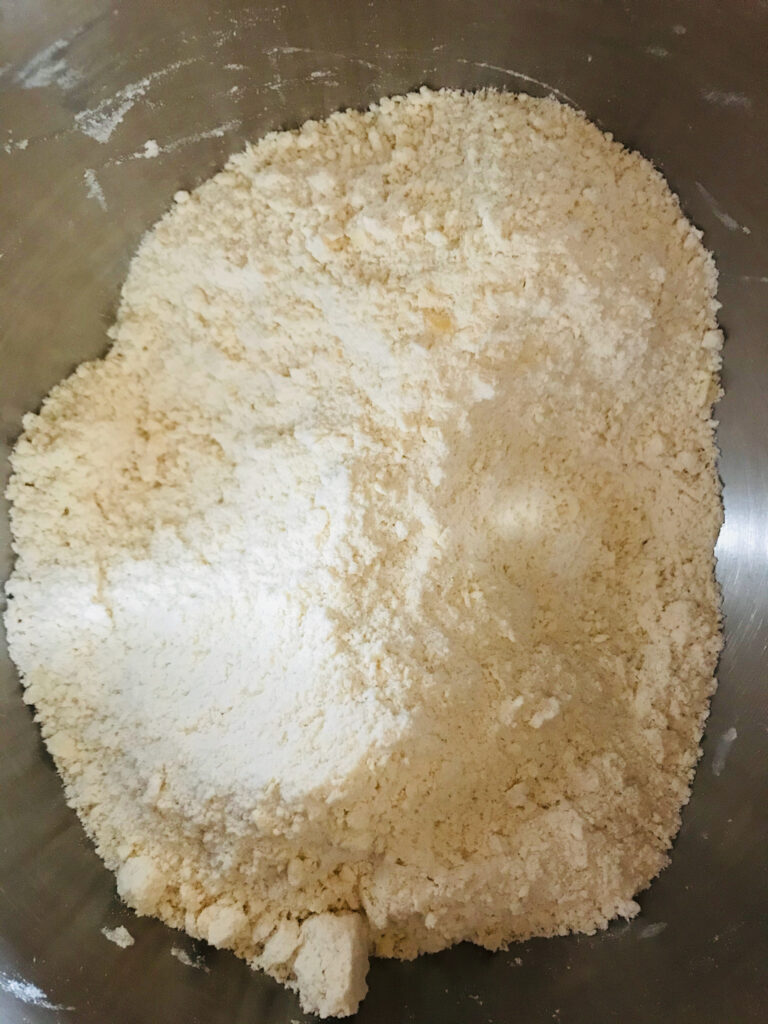
Into the bowl of a stand mixer, fitted with the dough hook attachment, measure in your 400g bread flour, 150g all-purpose flour, 50g cake flour, 12g salt and briefly whisk together (with a whisk or a fork, either works).


Note 1: Notes on why I’ve found I like to use 3 types of flour: the dough layers need to be strong enough to hold their own against the steam released by the butter layers while baking, and bread flour has the highest amount of protein of all the typical flours, which gives it good strength when rising, and allows it to hold its rise after having been baked. I really happen to like King Arthur brand bread and all-purpose flours; they also have a fully US-sourced red-wheat, organic all-purpose flour that is really good, and really quite silky. King Arthur’s all-purpose flour, however, also has a higher protein content than most other all-purpose flours on the market, which makes it a great choice for having that be the only flour you might have on hand; it’s really versatile and strong. But I also want my puff pastry to be tender, and once it’s risen and puffed up, I want it to be flaky and crispy, therefore, I subbed out a smidge of all-purpose flour for cake flour, (which has a very low protein content.)
With the dough hook attached, and the mixer running on low, add your butter (from your 113g) just a pat at a time, and let the mixer break up the butter and disperse it until it almost resembles a sandy pie-crust-dough-in-the-making.


Note 2: I did choose to take the bowl off the mixer briefly and mix and rub the last of the butter bits by hand until I got this rough, sandy texture:
Return the bowl to the mixer and pour in your 290g cool water in a slow and steady stream.


Once all the water is added, increase the mixer’s speed to medium and allow the dough hook to knead the dough together until the sides of the bowl are cleaned and the dough is homogeneous and almost shiny. This may take up to 10 minutes.


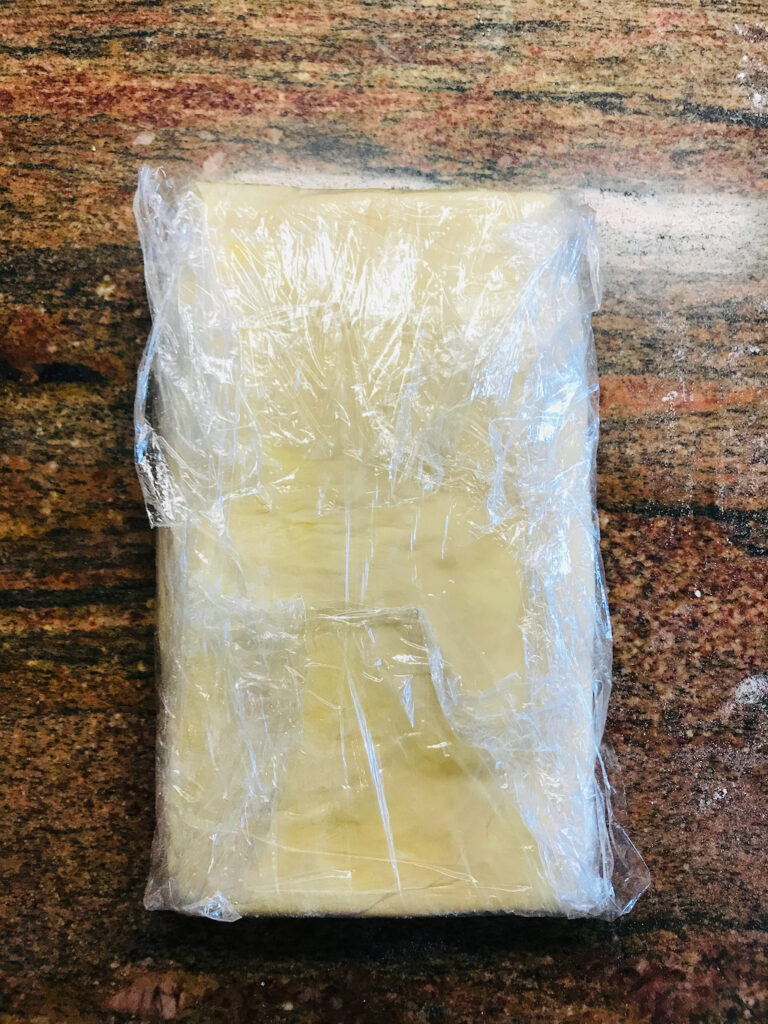
Then remove the dough from the bowl, and just using your hands, pat the dough into a rectangle about 1 inch thick.


Wrap in plastic wrap and let the dough (and all its gluten you’ve just worked) rest and chill for at least 30 minutes. If it’s still particularly floppy after 30 minutes or doesn’t feel chilled all the way to the center of your rectangular dough block, let it rest and chill another 10 minutes.

Now it’s time to make the butter block!
Switch the mixer to the paddle attachment, but in the same stand-mixer bowl (no need to even clean it out), place your 453g high-fat-content butter and 70g bread flour, and mix on low until the flour is mixed in and won’t splash out of the bowl and make a big mess, then increase the speed to medium or medium-high and beat until the butter is creamed and the flour is completely mixed in.


Then, using a silicone spatula, scrape all the butter onto the bottom half of a large sheet of parchment paper and using a pallet knife, spread the butter to a rectangle about ½ inch thick.


Note 3: The dimensions of your butter block don’t matter as much as the thickness, so just spread to about ½ inch thick. DO try to get a pretty decent rectangle shape, because the rectangle butter block will shape your dough in the following steps from here on out.
Fold the parchment up and over and wrap the butter block in the parchment, and encase it all over in the paper. Use that parchment packet to even further smooth out the thickness of the block and also to get really nice corners on your rectangle.


Place the butter block in the fridge for about 30 minutes.
Next, remove the dough and butter block from the fridge.


Note 4: Whenever removing the dough and butter from the refrigerator, you want them to both be chilled yet still pliable. Having added the little bit of bread flour when making the butter block will help the butter to roll at the same pace as the dough; it helps immensely. That being said, I sometimes find I need to remove the butter from the fridge about 10 minutes before I remove the dough.
To encase the butter in the dough, on a very, minimally-floured surface, roll the dough to a rectangle that meets the following 3 criteria (as closely as you can): 1.) twice as long as the butter block, 2.) about an inch wider on each side, and 3.) about ½ inch thick.


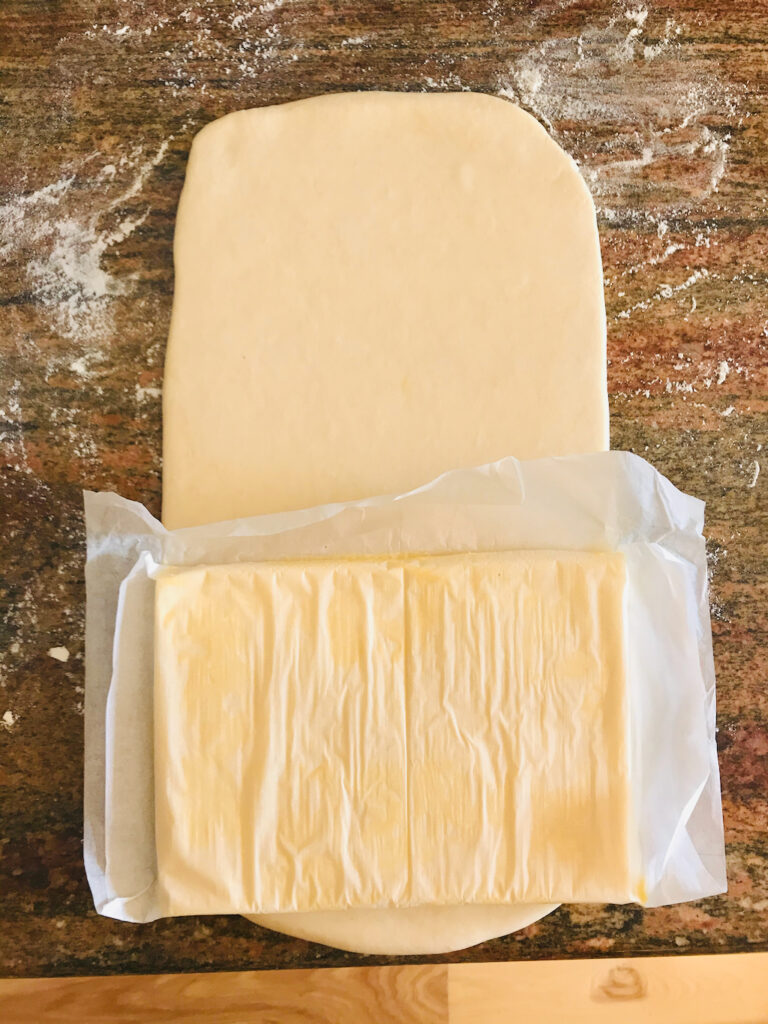
Don’t be afraid to manipulate the dough and grab parts and stretch it where you want it and where it needs to be.
When you’ve got your rectangle, use the parchment to help you place the butter block about an inch above the bottom of the dough and centered widthwise, then smooth the butter block onto the dough and remove the rest of the parchment.
Fold the top half of the dough over the butter. Smooth the folded edge first to make sure there isn’t any air, then smooth the two shorter sides, then smooth the last edge (at the bottom).


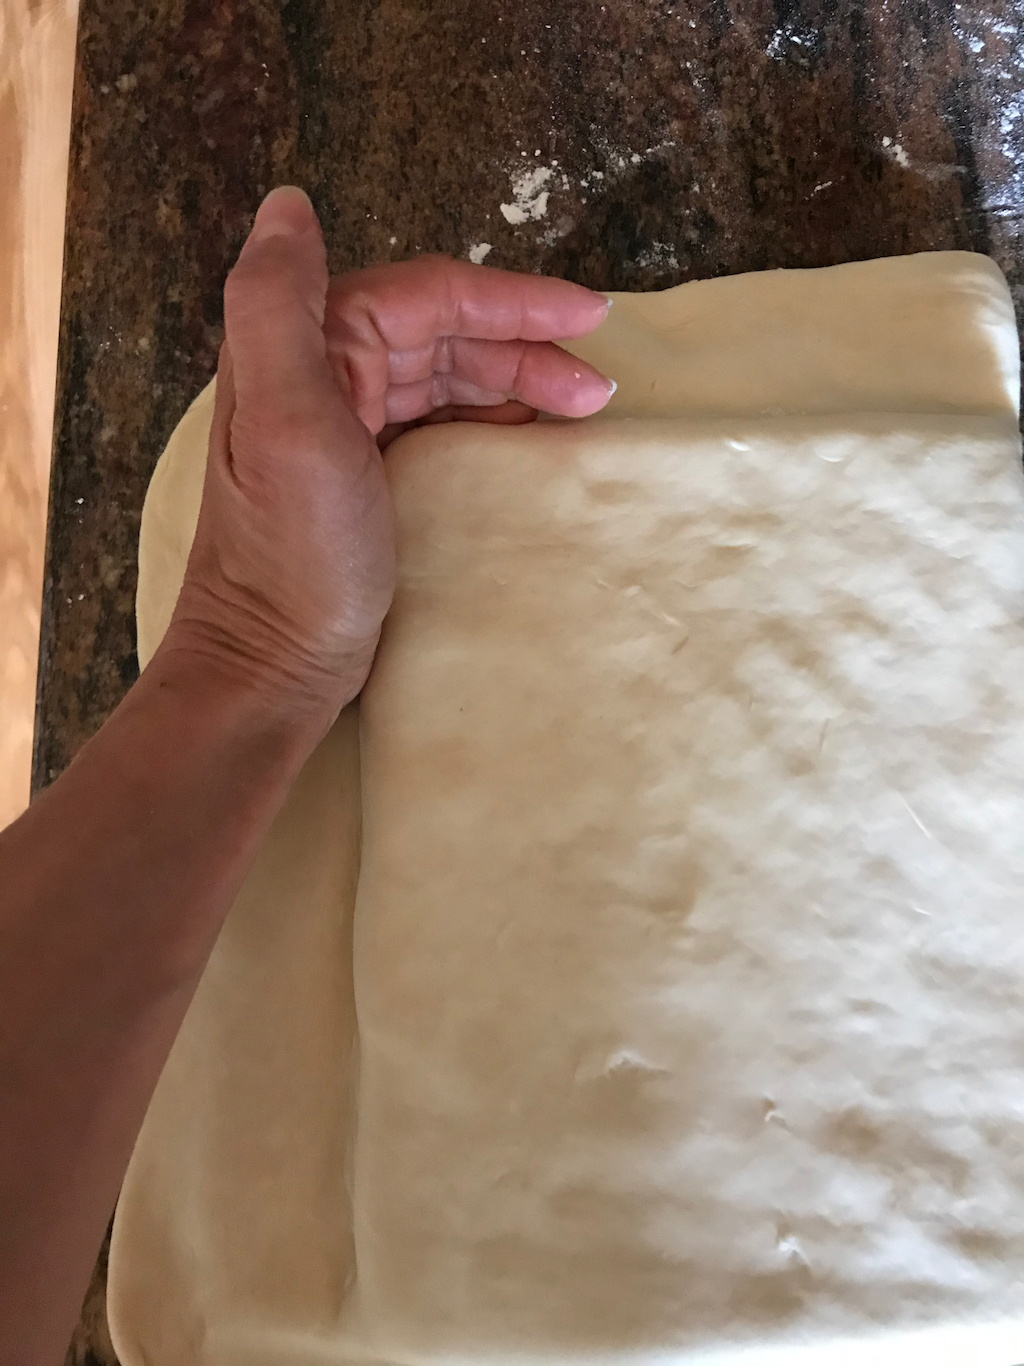

Then press the edges of the dough out to make thinner flaps. Fold those flaps up over the dough/butter packet, and press firmly to stick the dough back to itself and really seal that butter inside. Don’t be afraid to use a good amount of pressure, but just be sure not to punch your fingertips through the dough, punching a hole into the butter. Just don’t do that.


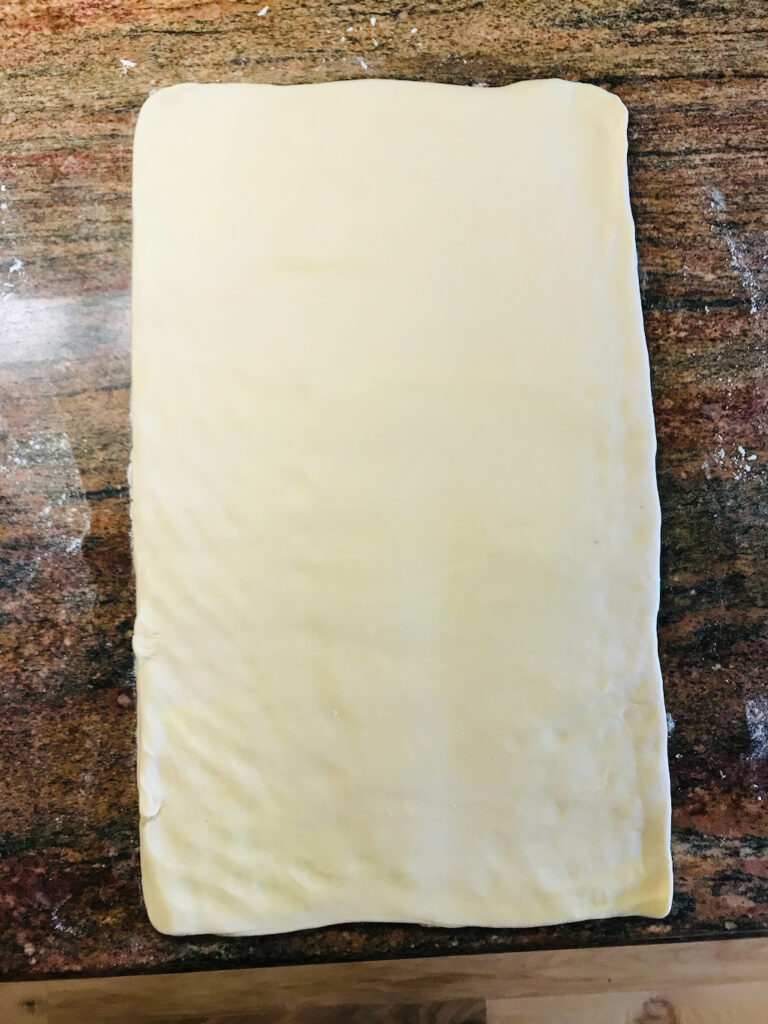
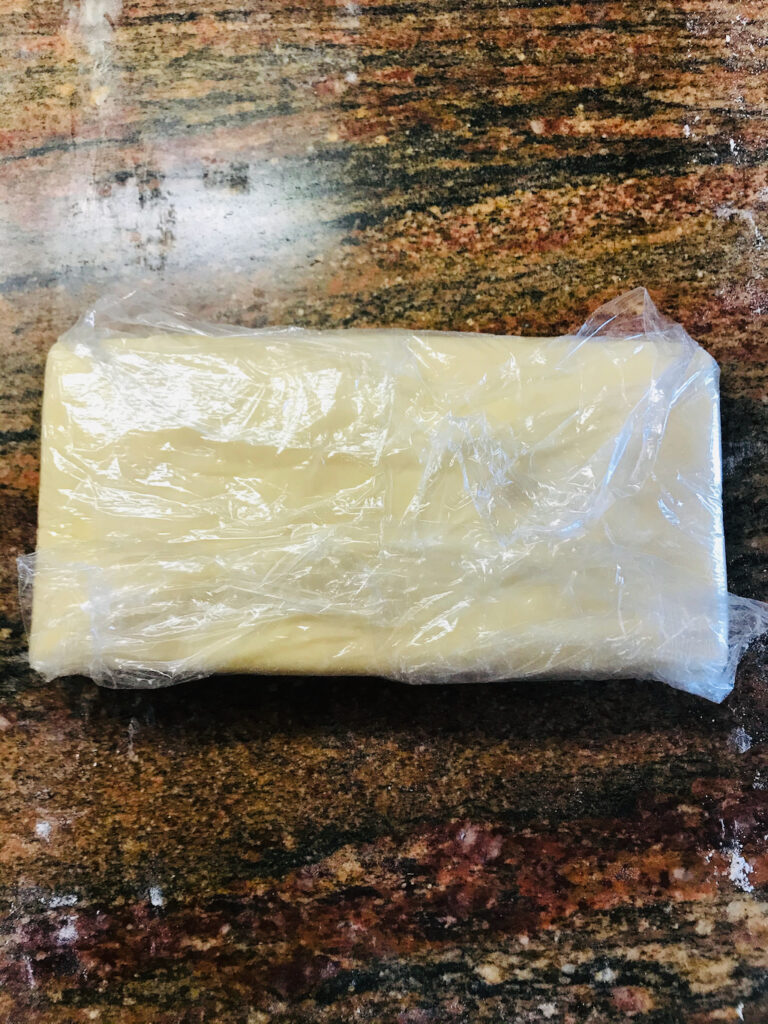
Press and smooth out your encased butter rectangle, flip it seam-side down and smooth a little bit again.
Then wrap in a couple sheets of plastic wrap and chill and rest for at least 30 minutes.


Time for the 1st Turn:
(When removing the dough from the refrigerator, make sure both the butter block and the dough “envelope” are chilled, firm, and pliable. If your butter feels like a solid brick that will crack, leave it on the counter for about 5 minutes until you feel you can bend it without breaking the butter block.)
On a lightly floured surface, roll the dough rectangle to ½ inch thick.


Note 5: Since this is the thickest the butter layer will ever be, go slowly on this first roll. Make sure your butter is chilled but pliable, and if the butter inside is too cold and therefore too brittle to roll, wait a few minutes. The dough also should just go where you roll it and stay there. If it springs back on you, it also needs a longer rest (though if it’s a rest only for the dough’s sake, it should happen in the refrigerator so as to keep the butter chilled – if the butter ever becomes too soft and you continue to roll, it will begin to meld with the dough, and you’ll essentially get a giant batch of unleavened brioche dough, nice maybe, but definitely not puff pastry.)
I generally roll to almost the right length and then start to roll out the width until I get the ½ inch thickness I’m after.
Once you’ve got your dough ½ inch thick, use your hands to manipulate any lumpy or wobbly edges and to stretch and shape any rounded corners back to squared corners.


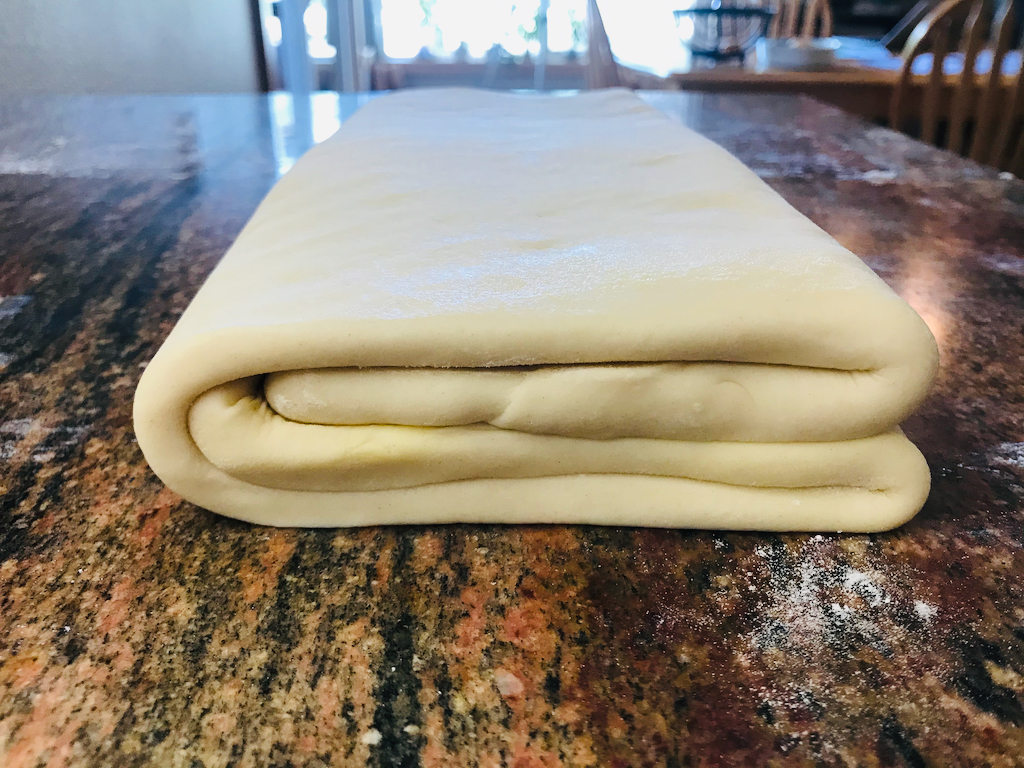
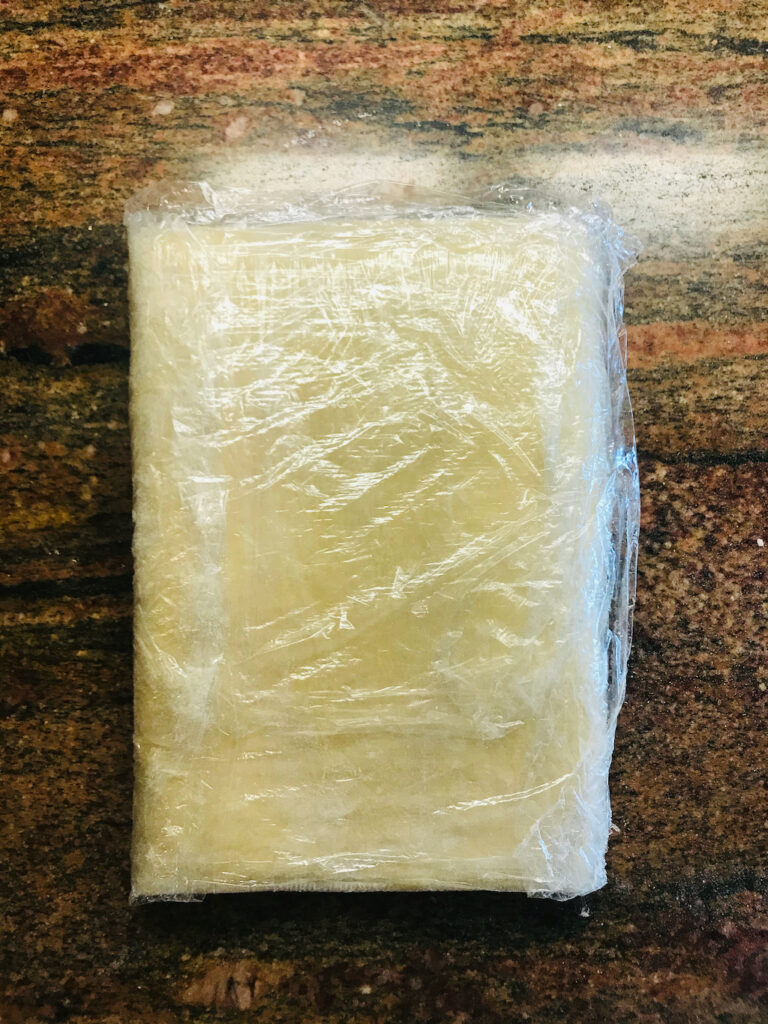
Do what’s called a 4-fold, which is: fold the top ¼ of the dough down, then the bottom third of the dough up to meet it in the middle-ish, and it will look like and open book with an off-center spine. Then fold the dough in half. Press gently to get all those layers pressed together and to get any air pockets out of the middle.


Wrap in plastic wrap and chill and rest for 30 minutes.
Note 6: If at any time you have any butter leakage, simply pat a little flour over the exposed butter spot and brush off any excess flour and keep going.


Note 7: I find I need to flip the dough at least once when rolling out the length so that the bottom layer of dough doesn’t fall behind, which can and usually does, lead to butter leakage.
Time for the 2nd Turn:
On a lightly-floured surface, roll the dough again to ½ inch thick. I start with the length, and when I get close to ½ inch thick, I then concentrate on rolling out some width. (Be sure to flip the dough at least once during rolling.)


Use your hands to manipulate the corners back and to straighten out any wobbly or lumpy edges of your rectangle.
Do what’s called a 3-fold, which is: fold the top third of the dough down, smooth out any air, then fold the bottom third up over the first again, gently smooth out any air. It will look like a folded business letter.


Wrap in plastic wrap and chill and rest for 30 minutes.
Time for the 3rd Turn:
On a lightly-floured surface, roll the dough to ½ inch thick. (Being sure to flip the dough at least once during rolling.) Use your hands to manipulate the corners and smooth out those edges.


Do another 4-fold: Fold the top ¼ of the dough down, then the bottom 1/3 of the dough up to meet the seam just off center. It will look like an open book with an off-center spine.


Wrap in plastic and chill for 30 minutes.
Time for the 4th and final Turn:
On a lightly-floured surface, roll the dough to ½ inch thick, straighten out the corners, smooth out the edges. (Being sure to flip the dough at least once during rolling.)


Do another 3-fold: Fold the top third of the dough down, then the bottom third of the dough up on top of that. Smooth out any air.


Wrap in plastic wrap and chill and rest for one more time, 30 minutes.
Time for final rolling!


Kind of like how once you’ve got everything in your pot of soup that will give it the flavor you want, it’s a giant pot of soup, once you’ve got the structure of the dough and enough butter in the butter block to get all the layers you want, it’s kind of a big batch of puff pastry dough. I’ve read in multiple places that this is just one of those dishes that doesn’t work well in smaller quantities. Happily, it freezes really well and thaws in about 10 minutes. So, with all my batches of puff pastry I’ve made this week, I rolled the final roll to ½ inch thick, cut the dough in half, then worked with half the dough at a time, chilling the other half in the refrigerator while it waited it’s turn.
With one half, I prepared it for freezing:
I rolled the dough to ¼ inch thick, then cut that dough in half. Then laid each piece on a lightly-floured piece of parchment paper, then folded in thirds (like how Pepperidge Farms does it) and wrapped that folded piece of puff pastry in plastic wrap, repeated with the other ¼ inch thick piece of pastry, then placed both packets in a gallon-size Ziploc freezer bag.


It will keep in the freezer for at least 3 months.
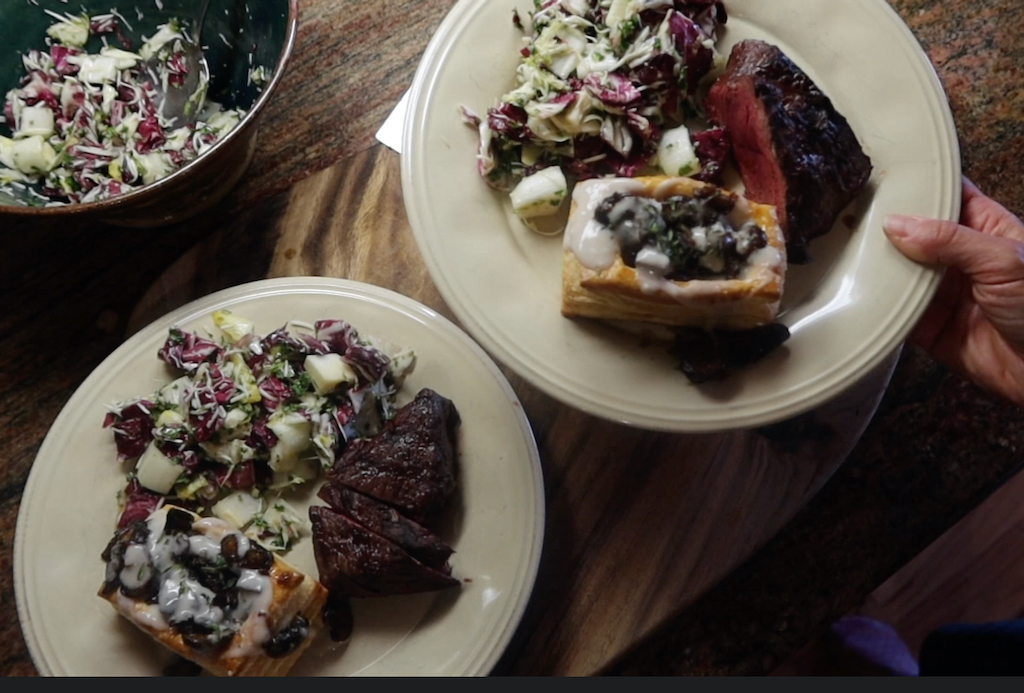
Now you can have Mushroom Vol Au Vent at a moment’s notice!!!
With the other half of the dough, I rolled to ¼ inch thick, cut that dough in half, placed one half on a piece of lightly-floured parchment, folded in thirds, wrapped in plastic and placed in a Ziploc bag… but this time put it in the refrigerator for making Mushroom Vol Au Vent very soon.


With the other half, I finally cracked open that ball jar of Vanilla Spiced Sugar that has been waiting for just this moment, and made Palmiers.


The uses for puff pastry are practically endless: Mushroom Vol Au Vent, Palmiers, Bijou Beef Wellington, topping a chicken pot pie, fruit tarts of all manner, asparagus gallettes. As more recipes and uses for this flaky bit of divinity pop up on the blog, now you’ll know how to make your very own!
Enjoy!
—Becky
Download the recipe file here.