Positively Perfect Roasted Chicken
They all say, the mark of a good cook is how well they roast a chicken.
{This post contains some Amazon affiliate links. If you click on and purchase an item linked in my blog posts or from the store page, I will earn a percentage from Amazon. Your purchases don’t cost you any more, but it certainly does help me and my blog!}
(Jump to the recipe file here.)
That’s great news, because my roasted chicken is pretty darned good… which must mean, I’m a pretty darned good cook. In truth, what it actually means, is that I knew where to look for a good roasted chicken recipe, because I got mine from Samin Nosrat’s Netflix series Salt Fat Acid Heat.
But this is decidedly one of those kitchen staple recipes that I think everyone should know how to make. You’ll be so happy with yourself!
Not only is this a really delicious, juicy, show-stopping main dish the day you make it, but if you go ahead and roast a full-size chicken, you’ll have the best-prepped chicken for at least 2 more dinners. I always follow up roast-chicken night with chicken tacos, chicken pot pie, chicken salad, or chicken enchiladas.


Once you put the work into the first night’s dinner, you’ve automatically got two more dinners nailed down. It’s a really good feeling.
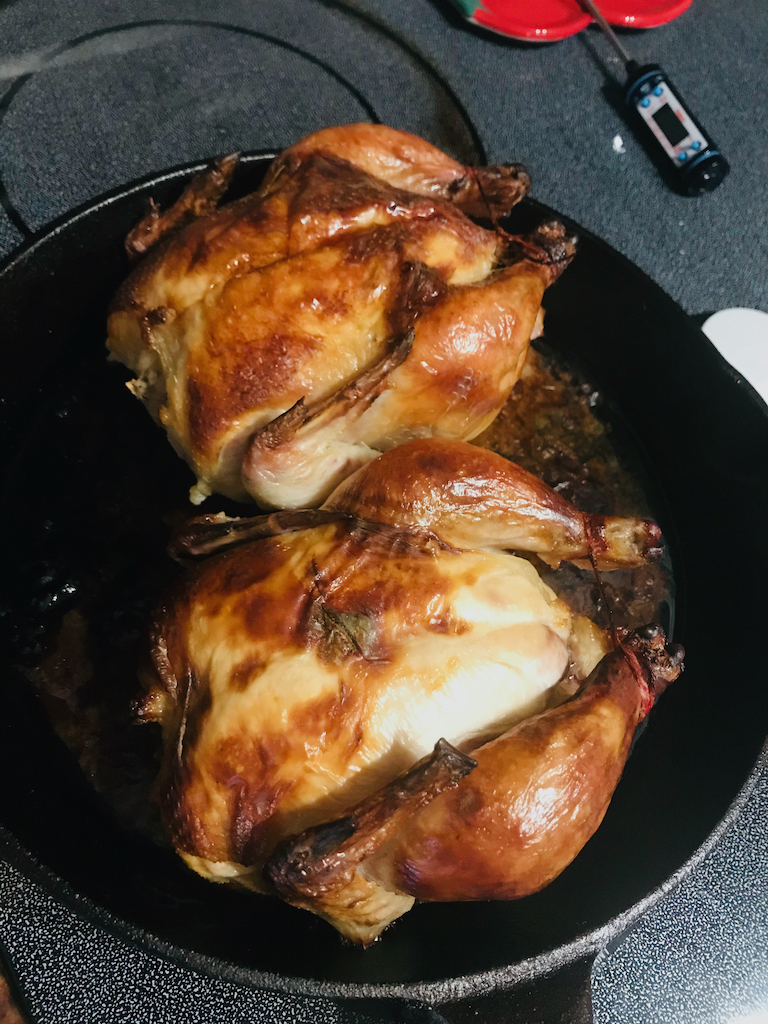
(This same technique also works on Cornish hens or bantam birds too. If cooking two Cornish hens, the cooking time generally stays the same, just check your internal temp about 10 minutes before, just in case they happen to be done sooner.)
A funny little story on how I came across this recipe: Two years ago, in the middle of the night, while my husband was out of town, I binged watched all four episodes of Samin Nosrat’s Salt Fat Acid Heat on Netflix. (That’s how I party.)
Now maybe I wasn’t being my most clever, being that it was in the middle of the night, but I took really detailed notes on a stack of post-it notes while she showed how to make this roasted chicken. (This turned out to be silly, because she has both a website and a book associated with that short docu-series, so… I could have just bookmarked the webpage…)
But I now know this recipe like the back of my hand, and I make it often, but it can also be a really special main dish. I plan to make this as the main dish for Christmas dinner this year.
So here it is:
Positively Prefect Roasted Chicken
You’ll need:
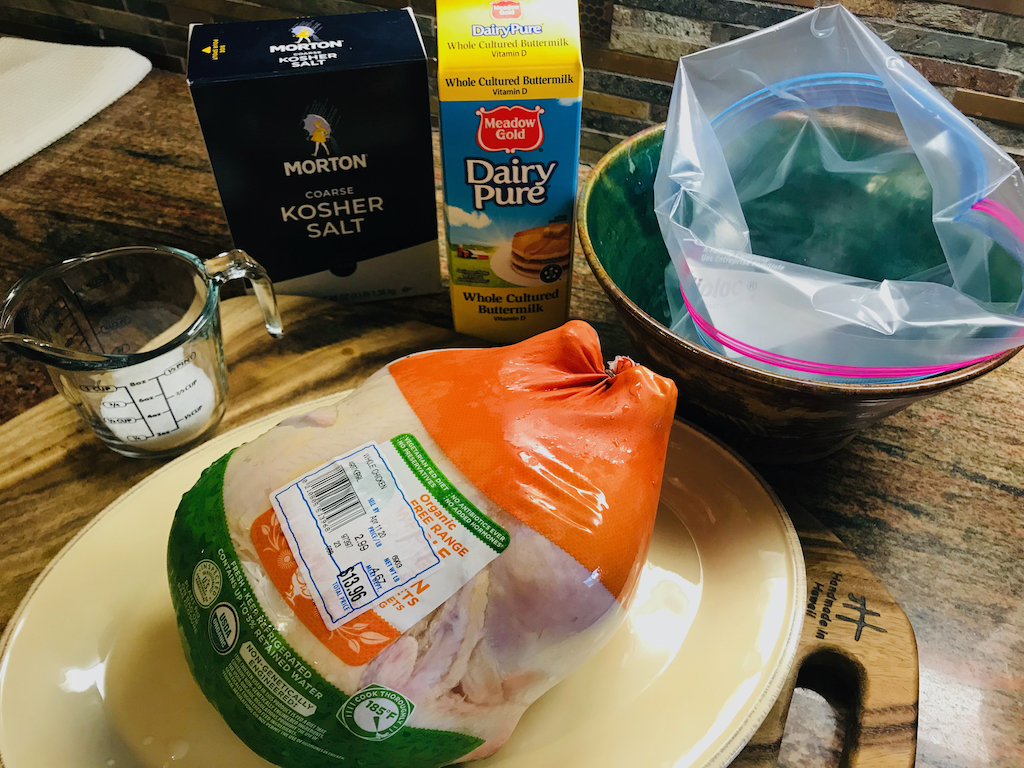
- 1 whole, organic, pasture-raised chicken (approximately 4-5 lbs.)
- approximately 1/4 cup coarse salt
- 2 cups buttermilk
- 1 Gallon-size Ziploc bag
- About 12” baker’s twine
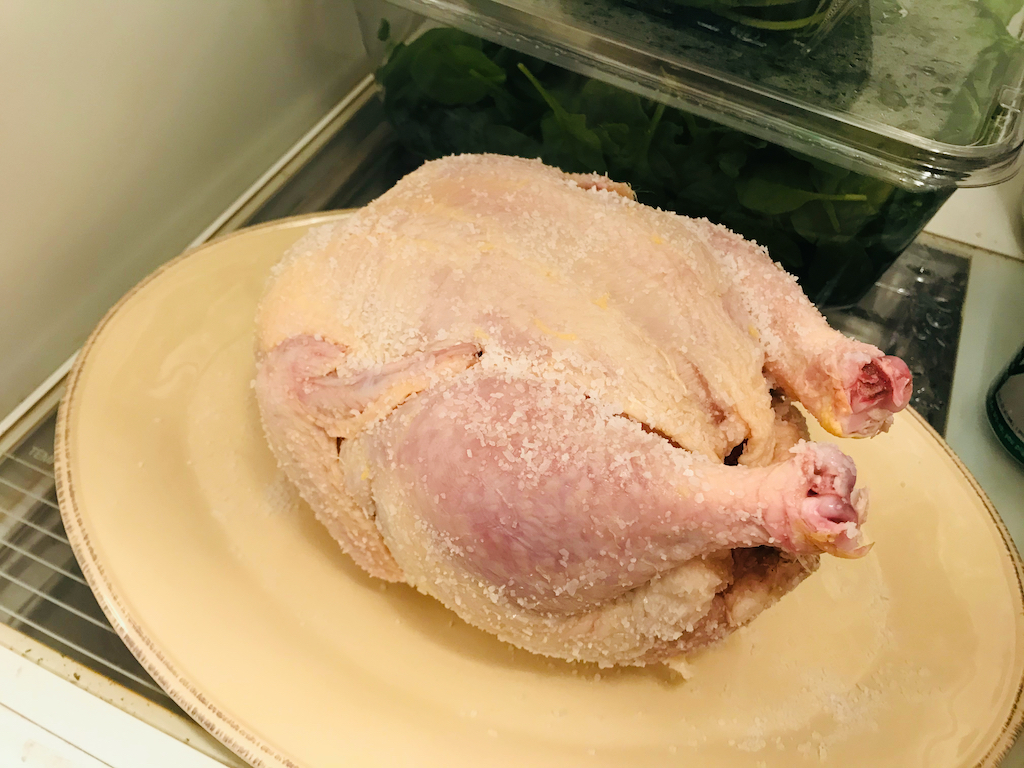
The night before you want to roast your chicken, remove from any plastic, rinse, and pat dry.
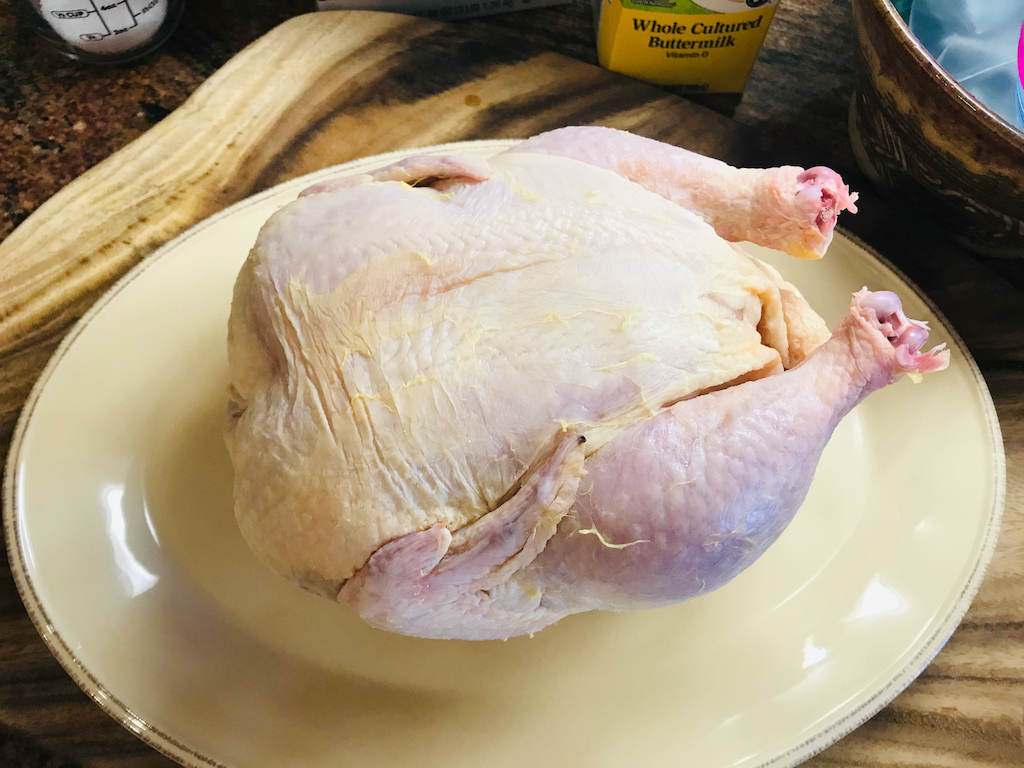
Then rub the entire chicken, top and bottom, front and back, with coarse salt. You do want to make sure it’s coarse salt, because a fine salt will draw too much moisture out of your bird too quickly.


Allow the salt-rubbed chicken to sit for 30 minutes.
Next, stir 2 Tbs coarse salt into your 2 cups buttermilk and stir to dissolve.
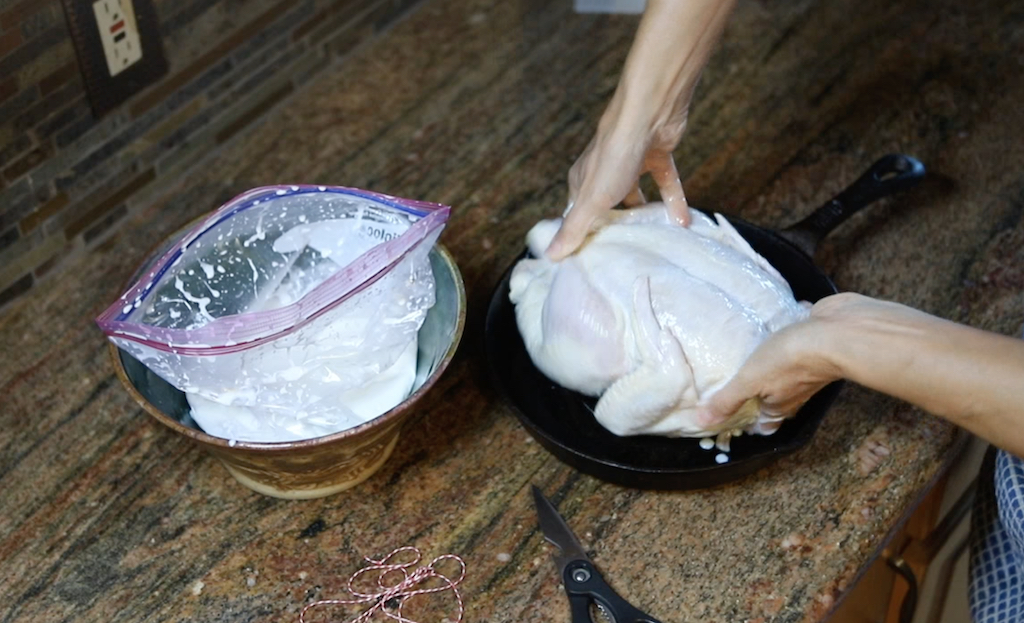
Place your whole chicken into a gallon-size Ziplog bag and place the bag in a large bowl that will hold it in place for you. (You can also fold down the zippered part of the bag to help the opening stay wide open while you place your bird.) Pour the salted buttermilk over the top of your chicken. Then seal your bag most of the way and squeeze as much air out of the bag as you can before sealing completely. Rub the buttermilk over the chicken to coat every bit. Then place the bowl in the refrigerator overnight.


(If you don’t quite have the time, or didn’t start your chicken the night before, I have in the past, let it marinate for as little as 3 hours, and it still worked out to be a moist bird, but overnight is the ideal.)
(While your bird is marinating, if you’re so inclined, you can peak back in on it and turn it around in the buttermilk a couple times, but that’s not essential.)
(One more note: if you’re having trouble getting your bird into a gallon-size bag, my City Market has large produce bags, and a couple of those doubled up and tied with a twist tie should work. Just be careful not to let it tip in the refrigerator. Salty buttermilk wouldn’t be the most pleasant thing to clean out of a refrigerator at the last minute. Otherwise, Reynolds makes oven-roasting turkey bags that could work, but would be a kind of pricey option. I have always managed to get mine in a Ziploc without trouble, hopefully you will too!)
Pull the chicken from the refrigerator an hour before you plan to cook it, but leave it in the bag of buttermilk.
When you are ready to cook, make sure your oven rack is in the center and preheat your oven to 425˚F.
I like to roast my chicken in a large cast iron skillet, but any large, oven-safe, thick-bottomed (ish) dish will work. Place your pan next to your bowl and lift your chicken from the bag and wipe off most of the buttermilk. I do this over the bag-still-in-the-bowl, and it’s easiest to grab the chicken by its legs and lift straight up with one hand and wipe with the other.


Place it in the pan, breast-side up.
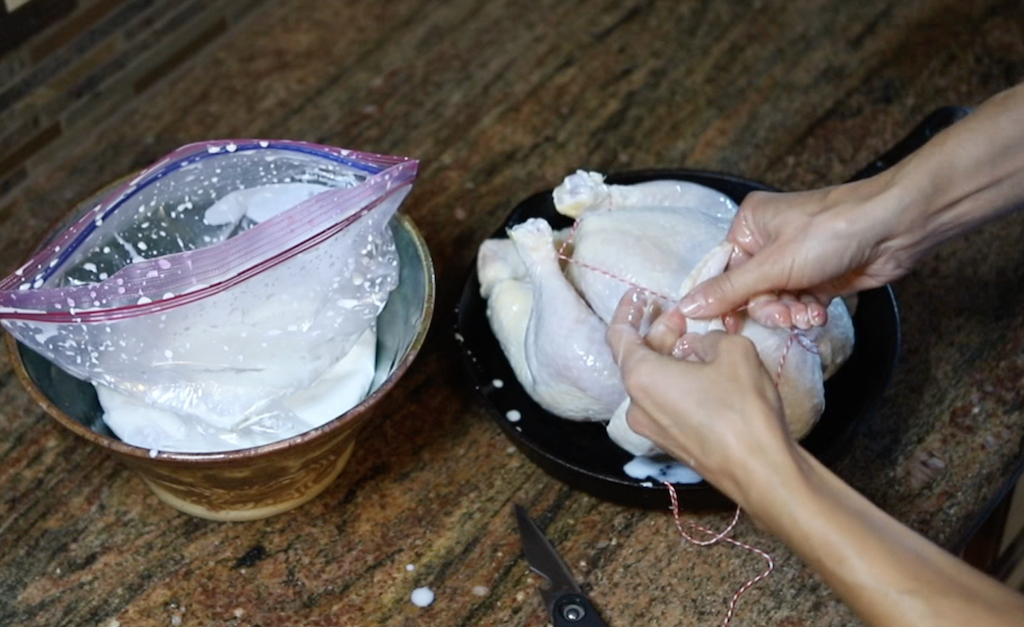
Next it’s time to truss your bird.
(I use this handy baker’s twine that I use every time I cook this chicken, as well as wrapping cookie bags at Christmas time and treats for Valentine’s day. I’ve been using this same roll of baker’s twine for 3 years now, so I think it’s a really great investment. It’s like a Maccabean menorah, that roll of twine.)
To truss your bird, cut about 12 inches of baker’s twine, and tie one end around one drumstick/leg and wrap it twice around that drum, then string the twine tightly to the wing on that same side and wrap the twine around the joint at the wing tip, then string the twine to the other wing tip and wrap a couple times around that, then string it to the other drumstick and wrap it around that leg, then tie the two end of the twine together, between the two legs.
When your oven is preheated, place the pan so that the legs are towards one of the back corners of the oven (the back corners tends to be the hottest part of an oven) and the breast is to center.
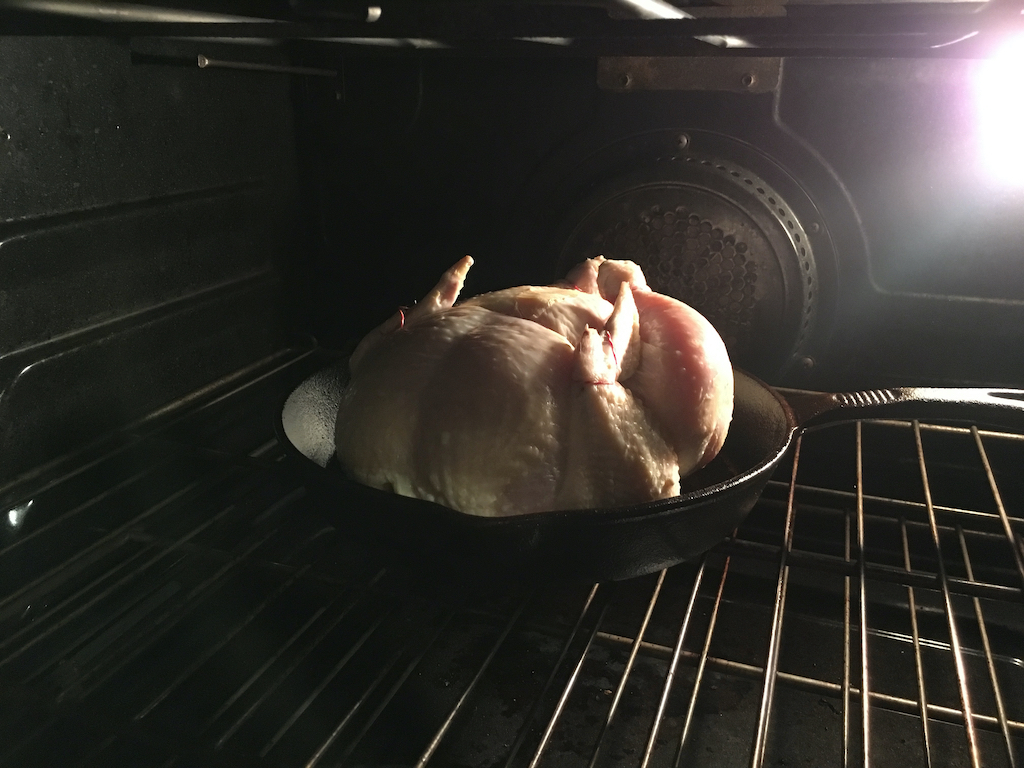
Cook at 425˚F for 20 minutes.
Then reduce the oven temperature to 400˚F and cook for 10 minutes more.
Then rotate the pan 180 degrees (so the legs are now facing the other corner) and bake for 30 minutes more.
(So that’s 1 hour of total roasting time to plan for.)
(BIG NOTE: If you find that the tips of your wings and the tips of your drumsticks, or even the top of the beast, are browning too quickly or too much, make some small aluminum foil dunce hats for the legs and drums and cut a small piece of foil to lay over the breast once they are browned as much as you’d like. I seldom need to shield the breast, but almost always shield the wing tips and drumstick tips. Samin Nosrat says to trim the wing tips off before roasting, but I find it much easier to truss my bird with them intact, and so I just tent them with the foil. I usually do this in the last 30 minutes of roasting.)


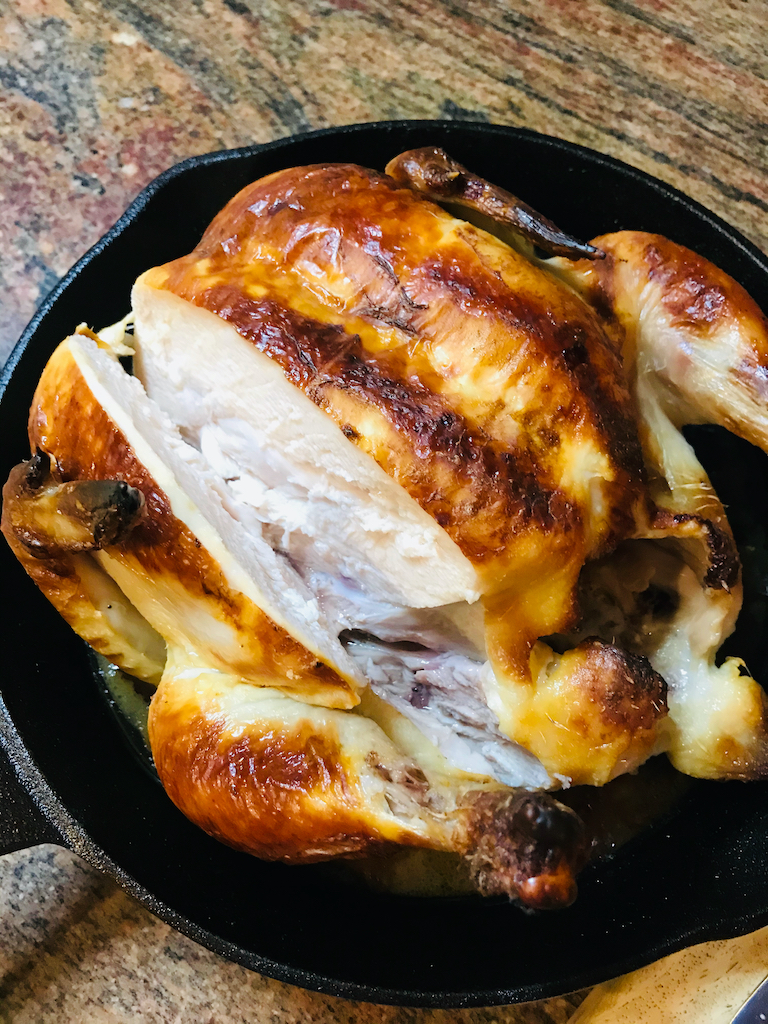
Your chicken is done when the juices run clear when you insert a knife at the leg joint or when a thermometer inserted at the leg joint reads 160˚F. (Clear juices is the best test, but I use my thermometer to let me know when I’m getting close. I insert the thermometer in the leg joint down to the bone and when it reads 158˚F, I tend to pull it from the oven, wait 5 minutes, then check to see if the juices run clear when I insert a knife, and if they are clear, then I turn off my oven.)

After your bird is baked, let it sit on the counter for 10 minutes before carving.
I generally serve all the best parts, like the breast and the thigh, as the main dish this first night,


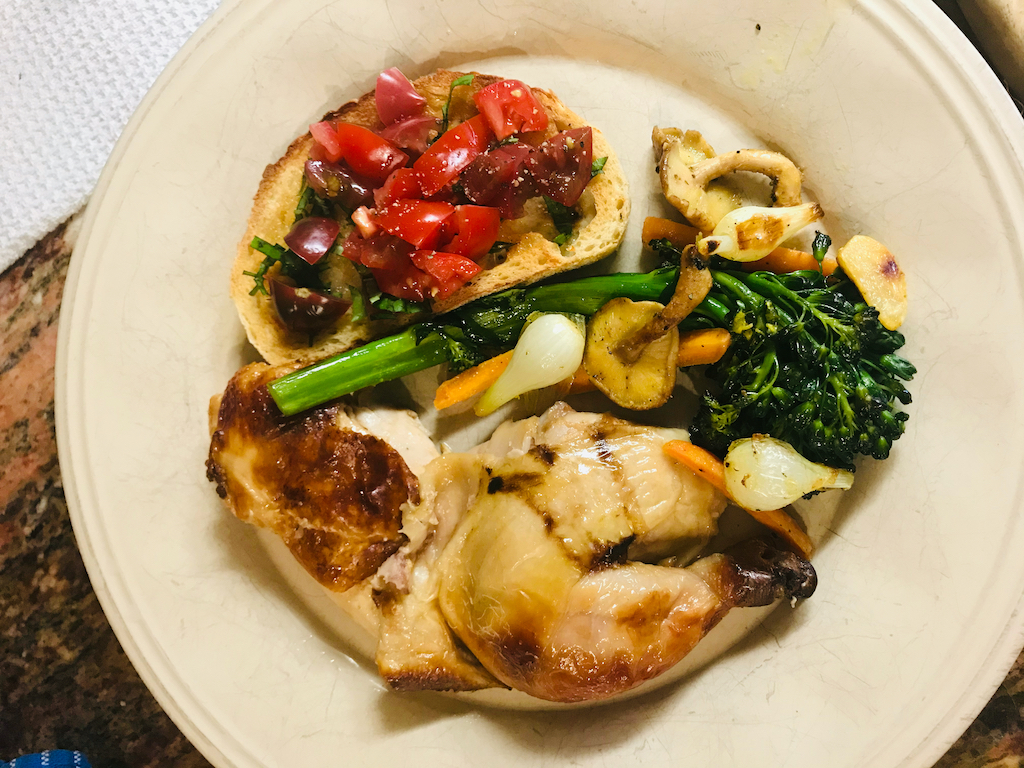
and then after dinner, I clean the rest of the meat into a glass storage container for the next two nights’ dinners.
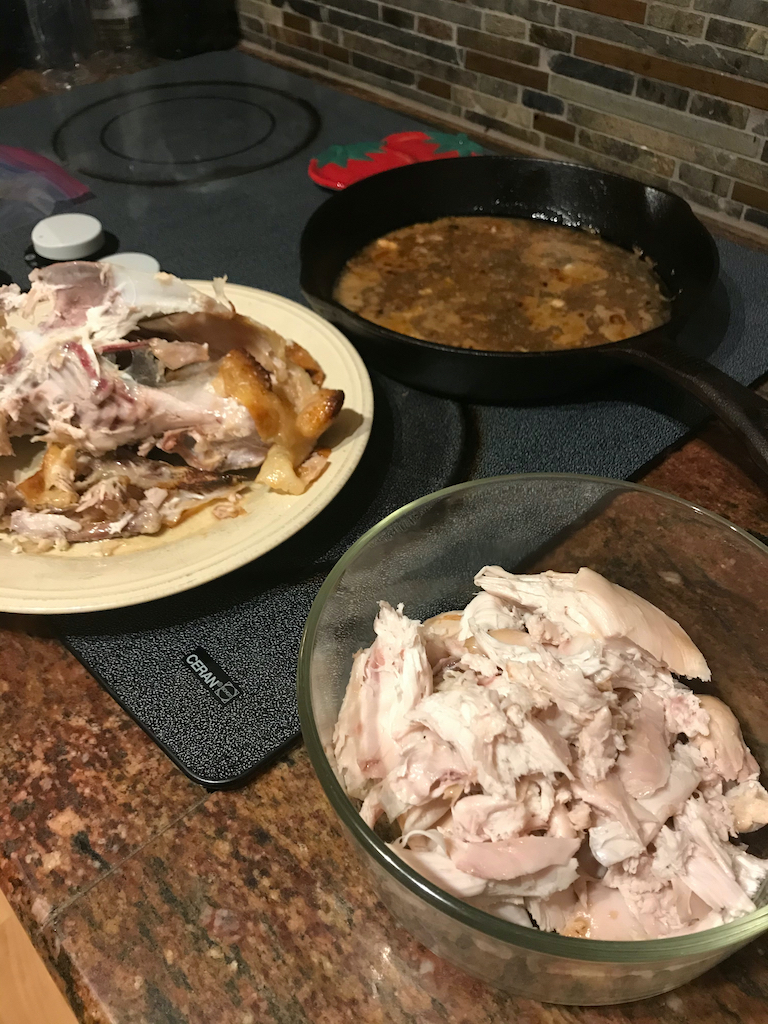
And now for the last, and perhaps the most important tip I can give you: DO NOT TOSS OUT THOSE PAN DRIPPINGS!!! I mean it. Your bird has been working for an hour to make the most potent, flavorful gravy, roux, pot pie sauce, soup enhancer ever.
Label a quart-size freezer bag and place it into a small glass, and scrape that liquid gold in there. Pop it in the freezer for whenever you may need it. I have a stack of flattened bags of pan drippings, and I rue the day when I go to grab some to make some roux and don’t have any there waiting on me.


I really hope you enjoy this as much as I do and make it a part of your regular cooking rotation.
Enjoy and enjoy often!
‑-Becky
Download the recipe file here.