Quiche!
The Crowning Achievement of Leftover Ingredients.
If you’re asking yourself why you don’t make quiche more often, it’s a good question.

{This post contains some Amazon affiliate links. If you click on and purchase an item linked in my blog posts or from the store page, I will earn a percentage from Amazon. Your purchases don’t cost you any more, but it certainly does help me and my blog!}
(Jump to the recipe file here.)
I have a particular conundrum in my household, because mine is a family of three, and as you all know, unless you can find a helpful clerk at your local grocery store and he or she manages to find the butcher, and you ask for three 6 oz. portions of whatever-meat-it-is-you’d-like, you just have to take whatever portions of meat are shrink wrapped to the Styrofoam trays. Those portions are generally for one and a half people if it’s a steak cut, or two, four or six if it’s chicken or pork; you see my point. With my family of three, I always end up with a quarter pound of ground beef, or one sausage link, a single chicken breast, etc. And from day-to-day cooking, I also often end up with 4 stalks of asparagus, a quarter of an onion, a smattering of assorted fresh herb sprigs, etc. All really good stuff that I just cannot let go to waste.
Welcome, quiche, to my kitchen! A good quiche base is the perfect way to give those food remnants a second life and a way to really shine.


A good pie crust recipe is also an immensely versatile, and useful, thing to have in your back pocket.

And I’ve found just the one. I always make the full amount of the all-butter double pie crust recipe that I use, and if I do something that is open topped or single layered such as quiche, or something smaller, such as individual chicken pot pies, I pat the extra dough into a smooth disk, wrap it in plastic wrap several times, and put that in a freezer bag and then put that in the freezer. It has never let me down, thawing really well, and rolling out really nicely, and of course, baking up flaky and crisp.
It’s even gratifying to press together scraps of thawed pie crust and roll them out to make a quiche for dinner! So pat those scraps into a disc and save them in the freezer!
If you’re one of those cooks who always has eggs on hand, use them up!

I have a couple ducks, so eggs are always a pleasure to cook with. My sweet girl has laid one egg every day, excepting two, since October 15, 2019. To date, that’s nearly 300 eggs! Her eggs are truly things of beauty too. I love her, and I love her eggs.

I once decided to let my girl keep her eggs, but when she got up to three dozen and the weather started to get really hot, and she still showed no inclination to sit, I brought them inside after all… and made quiche!
Quiche is definitely in my regular meal rotation, and I generally end up making a quiche with the obligatory “nice salad” for dinner at least once every couple months.
So let’s get to it!
First, you’ll need a pie crust;
See my pie crust recipe here.
Then you’ll need a quiche base:

Since eggs vary, remember I use duck eggs for quiche more often than not, the thing to know is that you’re total quiche base should measure 2 ½ cups in total. Start by cracking your eggs into a large mixing bowl, then measure in the ½ cup of heavy cream and pour that into the bowl, then pour in enough milk to make a total of 2 ½ cups of egg-cream-milk. This generally ends up being about ¾ cup of milk. Add your salt and pepper, and then whisk until everything is well-combined and the eggs are well-beaten. Then set aside.


(I first read about this egg-cream-milk ratio on the site House of Yumm, and it has always worked out to make nice, finished, firm quiche even when using moister fillings like lots of fresh spinach.)
Choose your quiche fillings:
I love to do some onion, mushrooms, asparagus, bacon and/or sausage, spinach or broccoli, whatever I have on hand, But we also grow garlic here at home. We have a about a quarter of an acre devoted just to our garlic crop, and my husband and daughter named us Portal Farms, because we (and the garlic) do have a really nice view of a rock portal overlooking the Colorado River.
There are a few food combinations that are my absolute favorites, one is sage and eggs, the other, which I recently discovered how well they mix together when I made a garlic broth soup with only garlic, olive oil, sage and water, is sage and garlic. Below is my new, most-recent, all-time-favorite fillings combination for quiche:
My very latest favorite combinations is:
- 1 or 1/2 rasher of bacon, however much you have
- 1-2 oz. mushrooms (My favorite mushroom variety is oyster mushrooms, but my local grocery store generally has really nice shiitake, so I generally use those, but any kind you like will be great.)
- 4-6 cloves of garlic
- ½ half yellow onion -OR-
- 1-2 shallots
- 4 oz. spinach
- 6 oz. tomatoes
- 1-2 thick stalks of culinary sage
- 1-2 oz. parmesan cheese


For this quiche filling, I put the bacon, mushrooms, onions and garlic on a foil “pan” and cook it on the grill. The bacon, cooked on the grill, cooks super crispy, which I love, and doesn’t splatter in my kitchen, which I also love!
To do this, tear off about 14 inches of foil and fold up one side, running your fingernails gently at least an inch from the side all along the edge, making an even fold. Turn the foil and do the same fold on the other three sides, and just fold the corners together however they go neatly, and there! You’ve made a foil baking pan. (When you are done cooking on it, once the grill cools and the greasy “pan” cools slightly, you can dump or wipe the grease into the garbage bin and crumple the foil up and put it in the recycling bin.)


Preheat your grill to medium or medium-high. (Mine takes about 10 minutes to preheat.)
Cut the bacon strips in half. (This makes them easier to flip once on the grill in case they stick to the foil, which they generally do just a bit before the first flip.)

Arrange the bacon flat, in a single layer, on the foil.
Slice thin or dice the onions and scatter them over the bacon.
Peel and lightly crush the garlic cloves, just to open up the juices a bit, and scatter the cloves over the bacon as well.
And use a cookie sheet to transfer the pan to the grill.
Prepare a dinner plate lined with a paper towel, which you’ll use to remove all the crispy deliciousness once it’s done.
Check the bacon in about 10 minutes and flip it with a pair of tongs.
You’ll then want to check on the bacon every five minutes, flipping again as necessary until it’s reached your desired crispiness. While you’re checking on your bacon, you can also remove to your paper-towel-lined plate any onions and garlic that are done.

Once everything on the grill is done, remove it all to the paper-towel-lined plate and set aside inside.
With the tongs, or carefully with your hand, move the foil pan to the coolest side of the grill and leave it there until it’s cool enough to remove and dispose of.
Next, prepare your crust (using the dough from the recipe linked above).

Liberally butter a glass pie pan with butter, and don’t be shy. You don’t not want your crust to fail to release from the pan because you skimped on the butter.
Preheat your oven to 350˚F.
Unwrap your pie crust disc, smudge a little flour around on your countertop, and start to roll out your pie crust. (I roll pie crust straight on my granite countertop, but if you have a marble cutting board, that will work really well too. If using a wooden surface, you may need quite a bit more flour for rolling, or if rolling on a laminate countertop, you may need less flour. The more pie crusts you roll out, you’ll get used to your surface.)

You may need to start by whapping your rolling pin across the disc to make an indentation in about three places across the dough.

Then roll from the center to the upper edge and again from center to the lower edge. Rotate the disc ¼ turn after every two rolls, and roll from the center up and then from the center down with each ¼ turn. Keep going like this until your pie crust is about 1/8” thick and is about an inch bigger than your pie dish on all sides, taking into account the depth of the sides of the dish.
Lay your rolling pin in the middle of the crust, and fold the top half over the pin to help you lift it over the baking dish. Try to center it the best you can, and roll the crust over the dish.
Then smooth it onto the bottom of the dish with your hands until the entire bottom is smooth, then smooth the crust up the sides of the dish.


If using a full-sized pie pan, roll the overhanging inch of crust under itself all along the edge of the dish, squeezing and rolling as you continue all along the top edge.

Then, pinch your thumb and index finger on the outside crust edge around your other index finger on the inside edge, and crimp to make a fluted edge all the way around.

Now, you ideally should pre-bake the crust by placing a sheet of parchment paper in the dish and filling with pie weights or dried beans, and baking for 20 minutes,
then removing the weights or beans and baking for another 10 minutes (this last step is mostly needed if you live in a more humid climate; I often skip this 10-minute, uncovered, portion of the pre-bake.)
I have, however, skipped the entire pre-bake step in the past, and the quiche and crust did turn out, but the overall baking time took much longer, in one case it baked for over an hour. It’s a little more predictable if you’re trying to get dinner on the table by a reasonable hour if you pre-bake the crust.
If using individual-sized pans, like the ones in these photos, I just trim the crust even with the top of the mold, and I do not pre-bake the crust here. It does really well, and gets nice and crispy across the bottom, and has a shorter baking time overall..


While your crust pre-bakes, prepare the rest of the quiche fillings:

Cut your spinach into ¼ inch pieces.
Just rock a big chef’s knife all along a pile of spinach, ¼ inch away from the last knife stroke, then turn your cutting board 90˚ and rock your knife all along, again in ¼ inch increments.
Dice your tomatoes.
And slice your sage.
Crumble up the bacon, and roughly chop up the garlic, then toss the bacon, onions and garlic together.
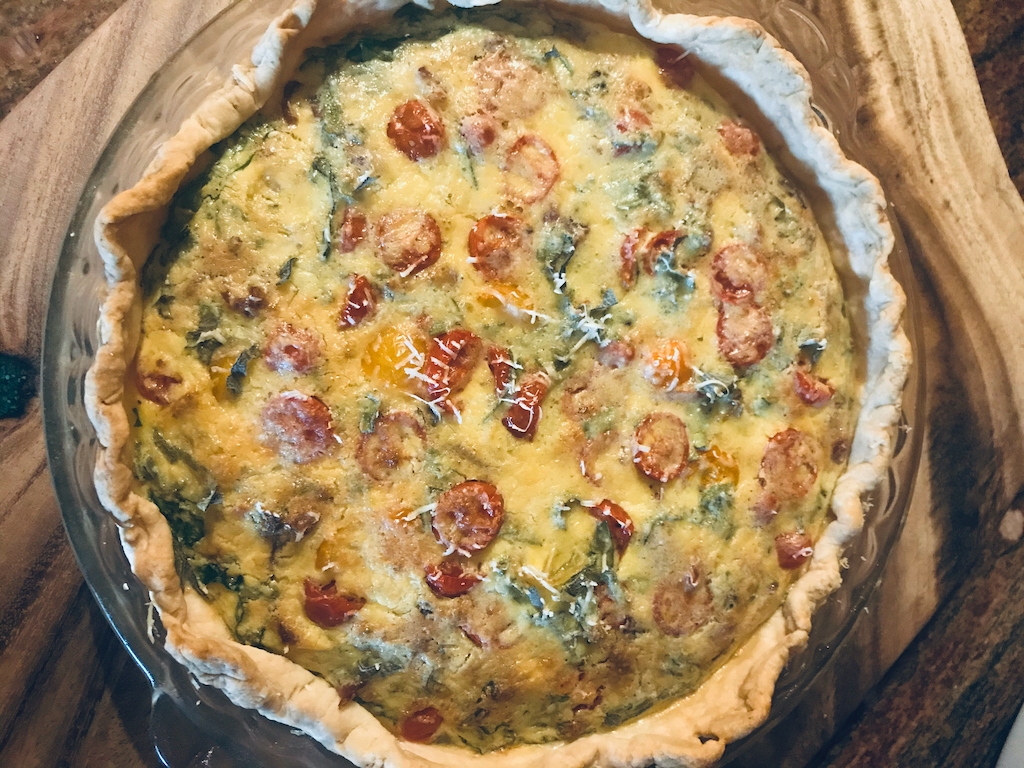
Once your crust is ready for the filling, place all of your filling ingredients into the crust, then pour the quiche base over the fillings.
I put the spinach on the bottom, then spread the bacon, onions and garlic. Then I layer on the tomatoes and then spread out the sage. Then pour your quiche base over the fillings. (You may need to briefly re-whisk the quiche base before pouring.)


Then, I like to grate a little parmesan cheese over the top to give the quiche a nice (and tasty) crusty layer on top. (I learned this from a savory soufflé recipe, whose author, Alex “French Guy Cooking,” did this to create a nice crust, and I found it works really nicely for quiche as well.)
Bake for 45-50 minutes, until the center of the quiche is barley wobbly when you juggle the dish.
(For a mini quiche [like the ones pictured earlier, which is a 5” pastry mold] bake at 375˚F for 30 minutes, or until the center is barely wobbly when you jiggle the pan.)
Allow the quiche to cool for approximately 20 minutes so you can slice it neatly. You can use this time to whip up some nice side salads!
Bon appetite!

Download the Quiche recipe file here.
Download the All-Butter Double Pie Crust recipe here.